
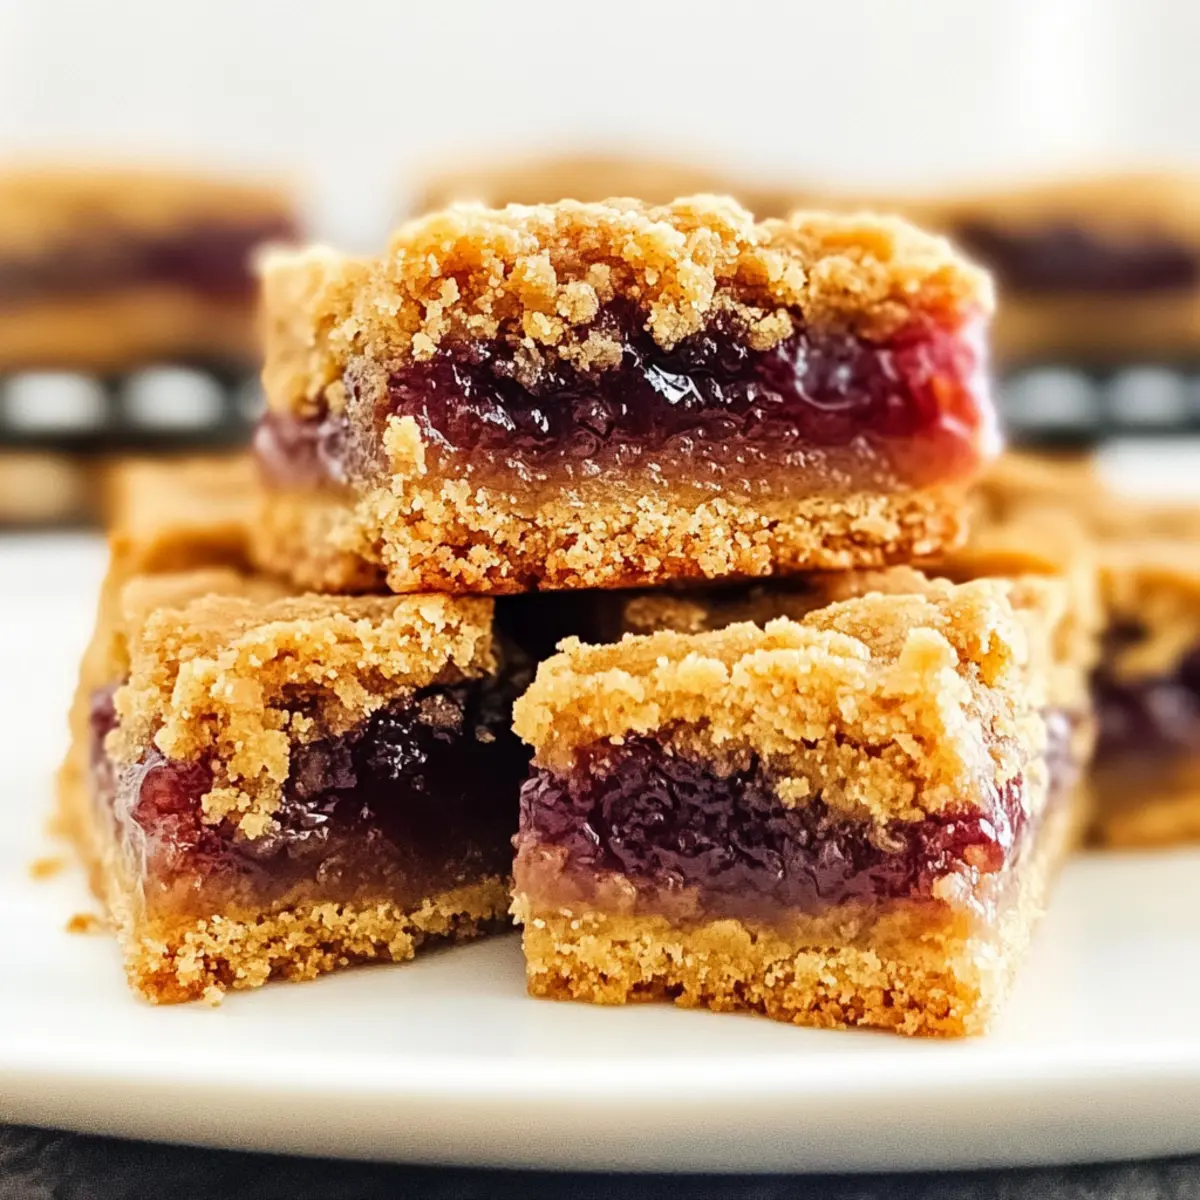
As I rummaged through my pantry one lazy afternoon, a flood of childhood memories swept over me—running through the fields with a peanut butter and jelly sandwich in hand, blissfully unaware of anything but that sweet, nutty taste. That surge of nostalgia inspired me to whip up a batch of Peanut Butter and Jelly Bars, a quick dessert that’s not only easy to make but also a total crowd-pleaser. These delightful bars combine the creamy richness of peanut butter with the classic sweetness of grape jelly, creating a soft, crumbly treat that melts in your mouth. Perfect for family gatherings or a fast indulgence during the week, they’re a charming nod to that beloved childhood classic. Curious to know how you can bring this nostalgic sweetness back to life in your kitchen? Let’s dive in!
Why are Peanut Butter and Jelly Bars a Must-Try?
Nostalgic Comfort: This recipe evokes childhood memories of that classic sandwich, bringing joy to every bite.
Simple Ingredients: Using pantry staples, you can whip up these bars with ease, making it an ideal choice for cooking newbies.
Endless Versatility: Feel free to swap out the grape jelly for your favorite flavors or even try different nut butters for a personal twist.
Time-Saving Delight: Bake in just about 40 minutes, perfect for a quick dessert solution that doesn't skimp on flavor.
Crowd-Pleasing Goodness: Whether for a family gathering or a snack during the week, these bars are sure to impress everyone, just like our Soft Baked Maple Donut Bars or fruity Peach Crumble Bars.
With this easy recipe, you’re on your way to creating your new favorite treat!
Peanut Butter and Jelly Bars Ingredients
• Create a delightful treat with simple ingredients!
For the Base
- Butter – Adds richness and moisture to the bars; use unsalted for better control of saltiness.
- Brown Sugar – Provides sweetness and depth, contributing to a tender texture; can substitute with coconut sugar for a different flavor.
- Granulated Sugar – Sweetens the recipe and helps achieve a structured dough; consider Stevia or erythritol for a lower-calorie option.
- Vanilla Extract – Enhances the flavor and aroma of the dessert bars; almond extract can be used for a unique twist.
- Eggs – Acts as a binding agent; for a vegan alternative, use flax eggs (1 tablespoon ground flaxseed + 2.5 tablespoon water).
- Self-Rising Flour – Provides structure and leavening; substitute with all-purpose flour, 1 teaspoon baking powder, and 1 teaspoon salt if needed.
For the Filling
- Peanut Butter – The star ingredient that offers creaminess and nutty flavor; almond butter can be swapped for a different nutty taste.
- Grape Jelly – Essential for that classic PB&J taste; feel free to switch this out with strawberry, blueberry, or your favorite jam for a personalized touch.
Now that you have everything you need, let’s get baking that delicious Peanut Butter and Jelly Bars, and bring back some sweet memories!
Step‑by‑Step Instructions for Peanut Butter and Jelly Bars
Step 1: Preheat the Oven
Begin by preheating your oven to 350°F (175°C). While the oven warms up, take a moment to grease a 9x13-inch baking dish with butter or non-stick spray. This preparation step ensures that your Peanut Butter and Jelly Bars will release easily after baking, providing you with perfect, intact bars to enjoy.
Step 2: Make the Dough
In a large mixing bowl, cream together ½ cup of butter, 1 cup of brown sugar, and ½ cup of granulated sugar using an electric mixer for 1-2 minutes. You want the mixture to become light and fluffy. This will create a delightful base for your dessert bars; its creamy texture sets the foundation for the rich flavors that follow.
Step 3: Combine Eggs and Peanut Butter
Next, beat in 2 whole eggs and 1 egg yolk along with 2 teaspoons of vanilla extract. Mix until fully combined, then gradually incorporate 2 cups of self-rising flour. Combine gently until just incorporated, being careful not to overmix. The dough should be slightly sticky and smooth, ready for the next delicious step in creating your Peanut Butter and Jelly Bars.
Step 4: Layer the Dough
Pour about two-thirds of the dough mixture into the greased baking dish, using a spatula to smooth it evenly across the bottom. This layer forms the base of your bars, providing a sturdy foundation for the sweet jelly layer. Ensure you spread it out for consistent baking, making sure the dough reaches the corners of the dish.
Step 5: Prepare the Jelly
In a small bowl, whisk 1 cup of grape jelly until it’s smooth and spreadable. This step helps to ensure even distribution when you layer it onto the dough. Once ready, carefully spread the jelly over the first dough layer, making sure to cover it completely. The jelly adds that classic sweetness, reminiscent of the beloved peanut butter and jelly sandwich.
Step 6: Top with Remaining Dough
With the remaining dough, drop spoonfuls over the jelly layer. Use the back of a spoon or your fingers to gently spread it out, making sure to cover most of the jelly without pressing too hard. This layer will create a delightful topping that blends beautifully with the peanut butter and jelly filling below, inviting everyone to dig in.
Step 7: Bake the Bars
Place the baking dish in your preheated oven and bake for about 40 minutes. Keep an eye on them; you'll know they’re done when the top turns a lovely golden brown and a toothpick inserted in the center comes out clean. The aroma of the Peanut Butter and Jelly Bars will fill your kitchen, making it hard to wait!
Step 8: Cool and Serve
Once baked, remove the dish from the oven and allow it to cool at room temperature for at least 30 minutes. This cooling period lets the bars set properly. Afterward, cut them into squares or rectangles, then serve them warm or at room temperature. Get ready to enjoy a delightful bite of nostalgia with every piece of these Peanut Butter and Jelly Bars!
What to Serve with Peanut Butter and Jelly Dessert Bars
Dive into delightful pairings that will elevate your dessert experience and make every bite unforgettable.
- Cool Glass of Milk: A classic pairing that balances the sweetness of the bars, providing a refreshing contrast.
- Vanilla Ice Cream: The creaminess offers a luxurious contrast to the crumbly texture of the dessert bars. Serve it alongside for a decadent treat!
- Fresh Berries: Juicy raspberries or strawberries can cut through the richness and add a burst of flavor. Their natural sweetness complements the bars perfectly.
- Chocolate Drizzle: For a bit of indulgence, try drizzling melted chocolate over the bars to enhance the nutty flavors of the peanut butter.
- Whipped Cream: Light and fluffy, whipped cream lends a cloud-like texture, adding a delightful lightness to each bite of the bars.
- Homemade Caramel Sauce: Drizzle warm caramel for an added layer of sweetness that ties together the peanut butter and jelly flavors beautifully.
- Chamomile Tea: Sipping on this soothing tea balances the sweetness while adding a calming touch to your dessert experience.
- Nutty Granola: A crunchy nut granola on the side brings a pleasing texture contrast and satisfies your craving for something crunchy.
- Sparkling Water: A refreshing choice, sparkling water cleanses your palate and enhances the dessert without overpowering its sweet flavors.
How to Store and Freeze Peanut Butter and Jelly Bars
Room Temperature: Keep the bars in an airtight container at room temperature for up to 3 days for optimal softness and flavor.
Fridge: Store in an airtight container in the fridge for up to a week if you prefer them chilled; allow them to come to room temperature before serving for the best taste.
Freezer: Wrap the bars tightly in plastic wrap or aluminum foil and place them in a freezer-friendly bag to freeze for up to a month. Make sure to label them with the date!
Reheating: For a warm treat, simply microwave a bar for about 10-15 seconds, bringing back that gooey, melty goodness of the Peanut Butter and Jelly Bars.
Make Ahead Options
These Peanut Butter and Jelly Dessert Bars are fantastic for meal prep enthusiasts! To save time, you can prepare the dough up to 24 hours in advance. Simply follow the first three steps of the recipe, then cover the prepared dough in the baking dish with plastic wrap and refrigerate. Additionally, you can also mix the grape jelly ahead of time and keep it in the fridge for a quick assembly. When you're ready to bake, just spread the jelly over the chilled dough, top with the remaining dough, and pop it in the oven. This method ensures that your bars come out just as delicious, transforming busy weeknights into sweet nostalgia with minimal effort!
Expert Tips for Peanut Butter and Jelly Bars
• Don’t Overmix: Ensure a tender texture by mixing your dough just until combined; overmixing can lead to tough bars.
• Choose the Right Jelly: The classic grape jelly is amazing, but feel free to swap it out for your favorite jam or preserve for unique flavors.
• Cool Before Cutting: Allow the bars to cool completely for better slicing, as warm bars can fall apart easily.
• Monitor Baking Time: Start checking around 35 minutes to avoid dry bars; doneness is indicated by a golden top and a clean toothpick.
• Serve with Flair: Pair your Peanut Butter and Jelly Bars with a scoop of vanilla ice cream or a drizzle of chocolate for an elevated treat.
Peanut Butter and Jelly Bars Variations
Customize your Peanut Butter and Jelly Bars into something uniquely yours, enhancing flavors and textures!
- Nut Butter Switch: Try almond or cashew butter for a different nutty flavor that still complements the jelly magnificently.
- Jelly Options: Replace grape jelly with strawberry, raspberry, or even apricot preserves to tickle your taste buds in delightful new ways.
- Add Crunch: Incorporate chopped nuts, like walnuts or peanuts, into the dough for a satisfying bite that contrasts beautifully with the soft bars.
- Chocolate Delight: Toss in chocolate chips or swirl melted chocolate on top for a delicious twist combining sweet, nutty, and chocolaty goodness.
- Spices Galore: A sprinkle of cinnamon or nutmeg in the dough can elevate the warmth and flavor profile, giving your bars a fragrant edge.
- Oat Crunch: Mix in rolled oats to the base for a chewier texture, reminiscent of an oat bar that adds heartiness to each bite.
- Dairy-Free Version: Use vegan butter and a plant-based milk alternative to make this classic dessert suitable for dairy-free friends.
- Heat It Up: Add a pinch of cayenne or chili powder for those who like a bit of spice with their sweet—this surprisingly delicious combo is sure to turn heads!
Don't forget to serve your bars with a glass of milk or alongside some homemade Butternut Squash Soup for a comforting treat that warms the heart!
Peanut Butter and Jelly Dessert Bars Recipe FAQs
How do I select ripe ingredients for Peanut Butter and Jelly Bars?
Absolutely! Fresh, quality ingredients yield the best results. For butter, ensure it's creamy and smooth; for eggs, choose large ones that are free from cracks, as they bind the dough well. If you opt for fruit jams, pick those without artificial preservatives and that have a rich color and fruity scent. If you’re using nut butters, look for brands with minimal added ingredients—pure nut butter is what you need!
How should I store Peanut Butter and Jelly Bars?
Very simple! Store your bars in an airtight container at room temperature for up to 3 days. For longer freshness, you can keep them in the fridge for up to a week. Just be sure to let them warm up a bit at room temperature for the best flavor before serving.
Can I freeze Peanut Butter and Jelly Bars?
Absolutely! These treat bars freeze beautifully. Wrap each bar tightly in plastic wrap or aluminum foil, then place them in a freezer-safe bag or container. They can be frozen for up to 3 months. When you want to enjoy them, simply thaw overnight in the refrigerator or for about 10-15 seconds in the microwave for that freshly-baked taste!
What if my Peanut Butter and Jelly Bars are too crumbly?
If your bars turn out too crumbly, it might be due to overmixing or excess flour. Make sure to combine your ingredients just until mixed. If this happens, you can make a quick fix by pressing the crumbly bars back together in your baking dish—I’ve done this before! A light drizzle of melted butter on top can also help bind them together.
Are there any dietary considerations for Peanut Butter and Jelly Bars?
Definitely! If you're concerned about allergies, be mindful of peanuts and eggs. You can easily make these bars dairy-free and vegan by substituting the butter with coconut oil and using flax eggs (1 tablespoon ground flaxseed mixed with 2.5 tablespoon water for each egg). If serving to children or pets, keep the portions small, as homemade treats can be rich.
What is the best way to ensure my Peanut Butter and Jelly Bars turn out perfectly?
Make sure to use room temperature butter and eggs for better incorporation, as cold ingredients can lead to uneven mixing. Always pre-measure your ingredients to avoid mistakes! Also, remember to check on your bars around the 35-minute mark; they should be golden brown on top with a toothpick coming out clean. Following these guidelines will lead to baking success!
Peanut Butter and Jelly Bars: Your New Favorite Treat!
Ingredients
Equipment
Method
- Preheat the oven to 350°F (175°C). Grease a 9x13-inch baking dish with butter or non-stick spray.
- In a large mixing bowl, cream together ½ cup of butter, 1 cup of brown sugar, and ½ cup of granulated sugar for 1-2 minutes.
- Beat in 2 whole eggs, 1 egg yolk, and 2 teaspoons of vanilla extract until fully combined. Gradually incorporate 2 cups of self-rising flour.
- Pour about two-thirds of the dough mixture into the greased baking dish and smooth it out evenly.
- In a small bowl, whisk 1 cup of grape jelly until smooth and spreadable, then carefully spread it over the dough layer.
- Drop spoonfuls of the remaining dough over the jelly layer and gently spread to cover most of the jelly.
- Bake for about 40 minutes or until the top turns golden brown and a toothpick comes out clean.
- Allow to cool at room temperature for at least 30 minutes before cutting into squares or rectangles.


Leave a Reply