
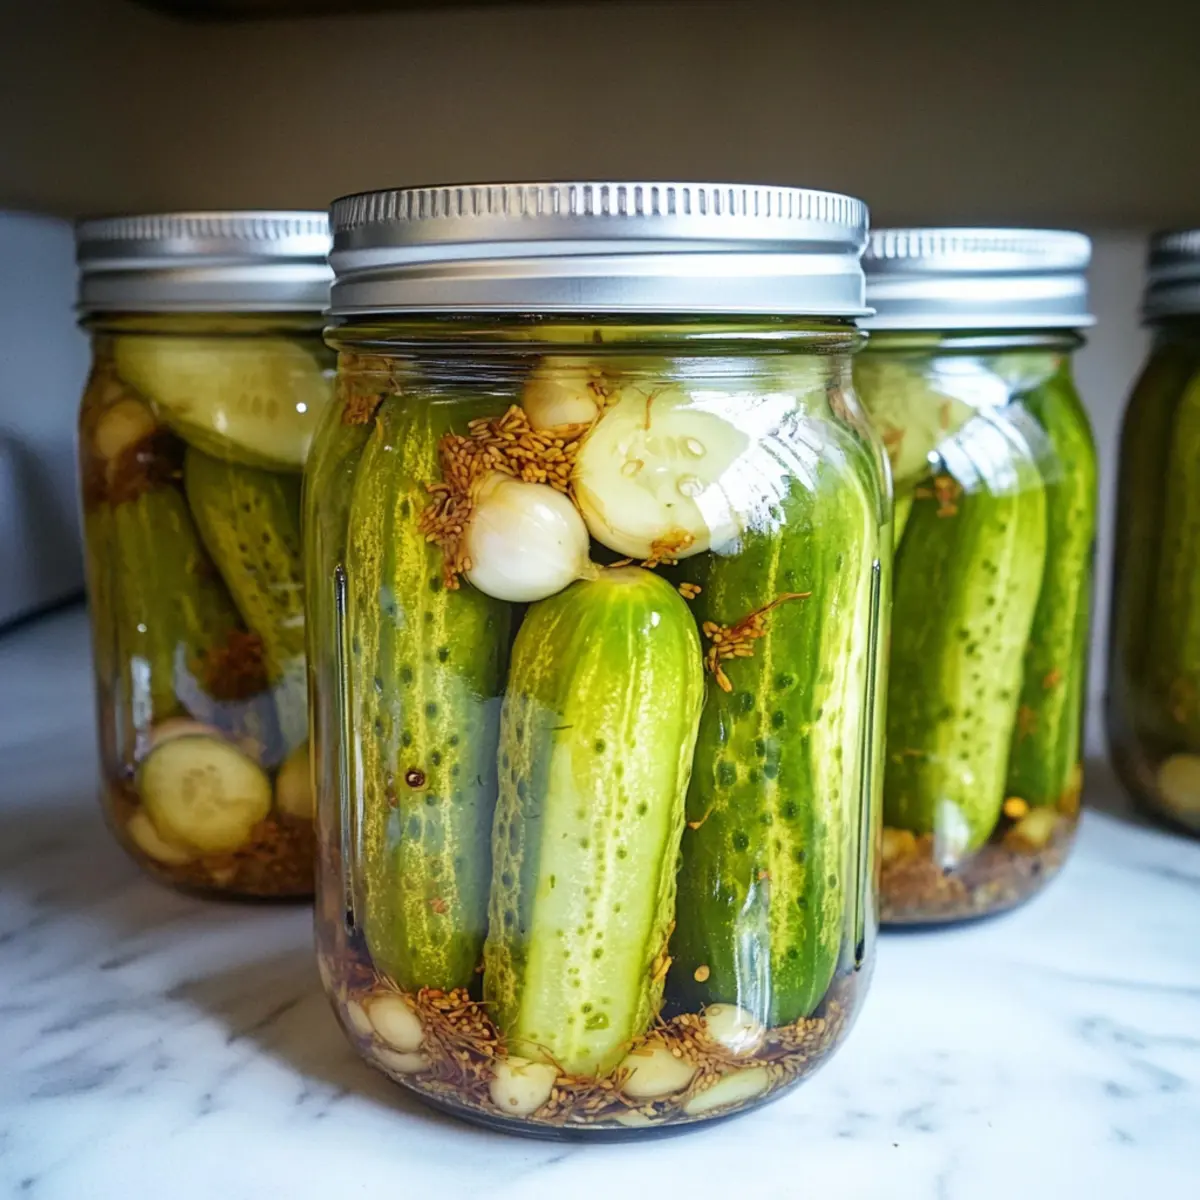
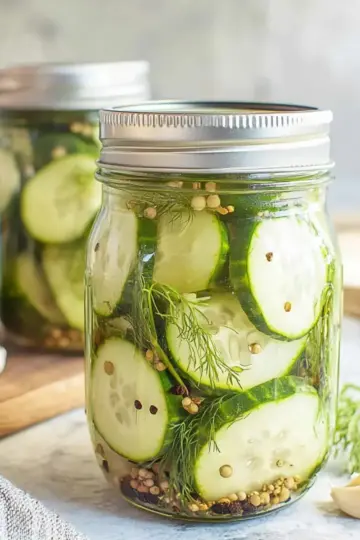
The aroma of garlic wafting through the kitchen instantly brings back memories of my grandmother’s garden, where those vibrant cucumbers grew in abundance. Today, I'm recreating that nostalgia with my Easy Refrigerator Garlic Dill Pickles. These quick and delightful pickles not only pack a satisfying crunch but also come together effortlessly without any canning fuss. They're the perfect homemade addition to elevate your meals, offering versatile seasoning options to adapt to any palate. Whether you’re looking to brighten up a sandwich or enjoy a refreshing snack on their own, these refrigerator garlic dill pickles are the answer. What creative ways will you find to enjoy them?
Why Make Refrigerator Garlic Dill Pickles?
Convenience: No canning is required! Quickly whip up these pickles in just a few easy steps.
Flavor Explosion: Infused with fresh garlic and dill, each bite delivers a delightful taste that’s far superior to store-bought options.
Customizable: Adjust the spice level with red pepper flakes or experiment with other seasonings like mustard seeds to match your taste.
Long-lasting: Stashed in the fridge, these pickles stay crunchy and flavorful for up to a year.
Versatile Uses: Enjoy them as a zesty snack, in sandwiches, or pairing with cheese and crackers for a scrumptious appetizer. If you love garlic flavors, you might also want to try these Garlic Butter Steak Bites or Garlic Parmesan Chicken!
Refrigerator Garlic Dill Pickles Ingredients
For the Pickles
• Pickling Cucumbers – Essential for a satisfying crunch; choose small cucumbers for the best texture.
• Garlic Cloves – Provides a robust garlicky flavor; feel free to adjust based on your taste preference.
• Fresh Dill Heads – Adds that classic dill flavor; if fresh isn't available, dried dill seed works as a substitute.
• Red Pepper Flakes – Introduces optional heat; adjust according to your spice tolerance for these refrigerator garlic dill pickles.
For the Brine
• Cider Vinegar – Imparts tanginess; can be swapped with white vinegar if necessary.
• Water – Balances acidity in the brine for a milder flavor.
• Pickling Spices – Enhances flavor complexity; choose a high-quality mix for the best results.
• Pickling Salt – Ensures crispness without clouding the brine, crucial for homemade pickles.
• Sugar – Balances out the acidity from the vinegar; adjust based on your preferred sweetness.
Step‑by‑Step Instructions for Refrigerator Garlic Dill Pickles
Step 1: Sterilize the Jars
Begin by sterilizing your jars to ensure freshness and safety. You can do this by placing them in the dishwasher on a hot cycle or boiling them in water for 10 minutes. This step is crucial for preventing any unwanted bacteria. Allow the jars to cool while you prepare the remaining ingredients for the Refrigerator Garlic Dill Pickles.
Step 2: Prepare the Flavors
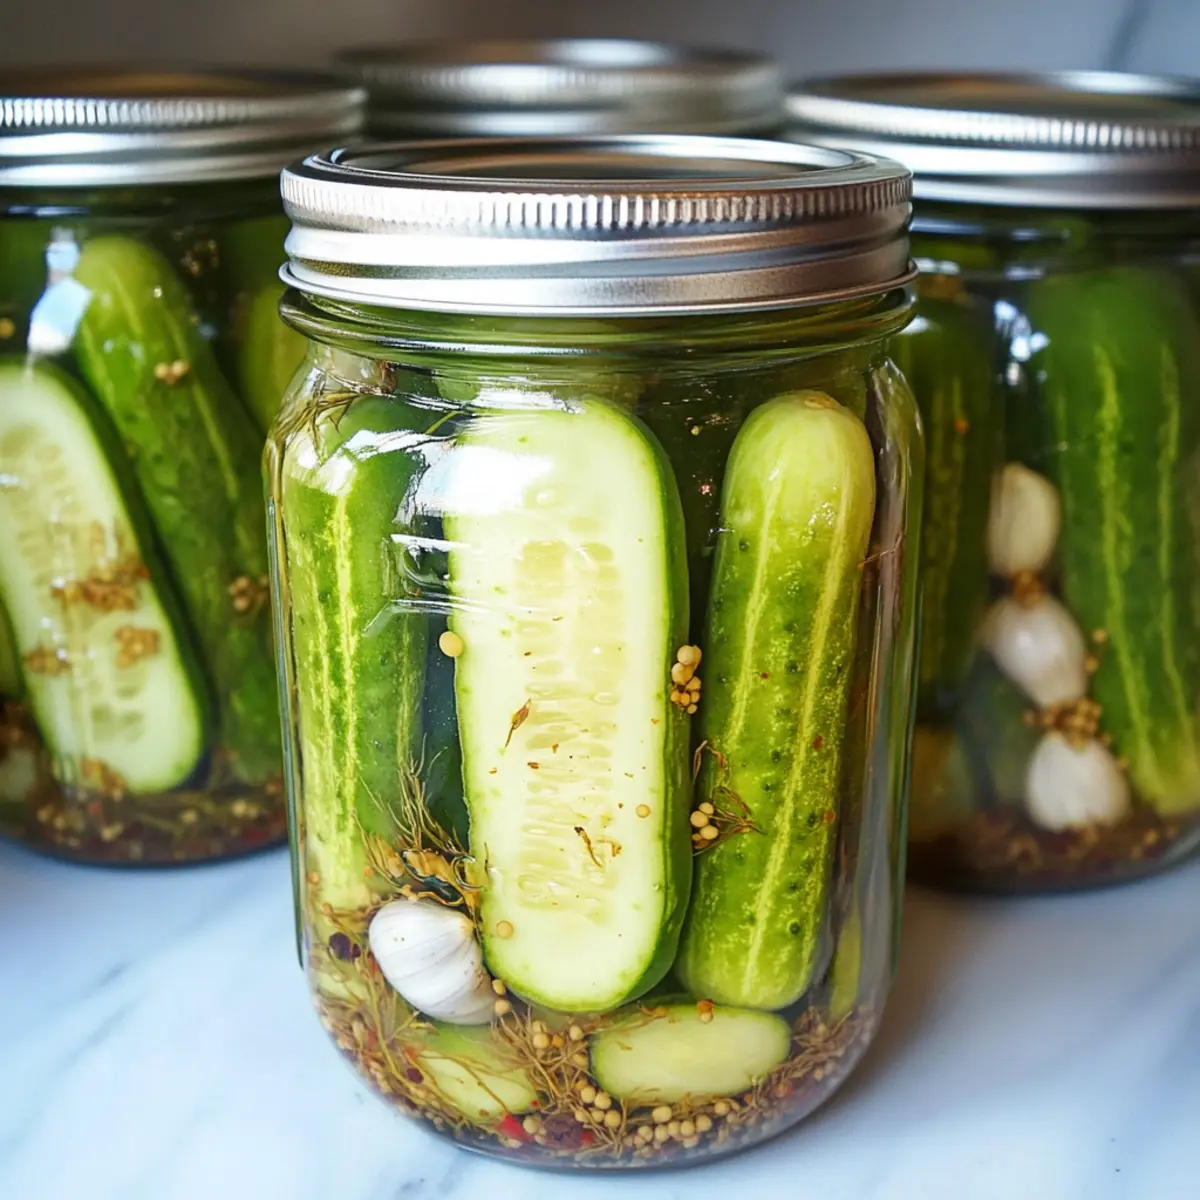
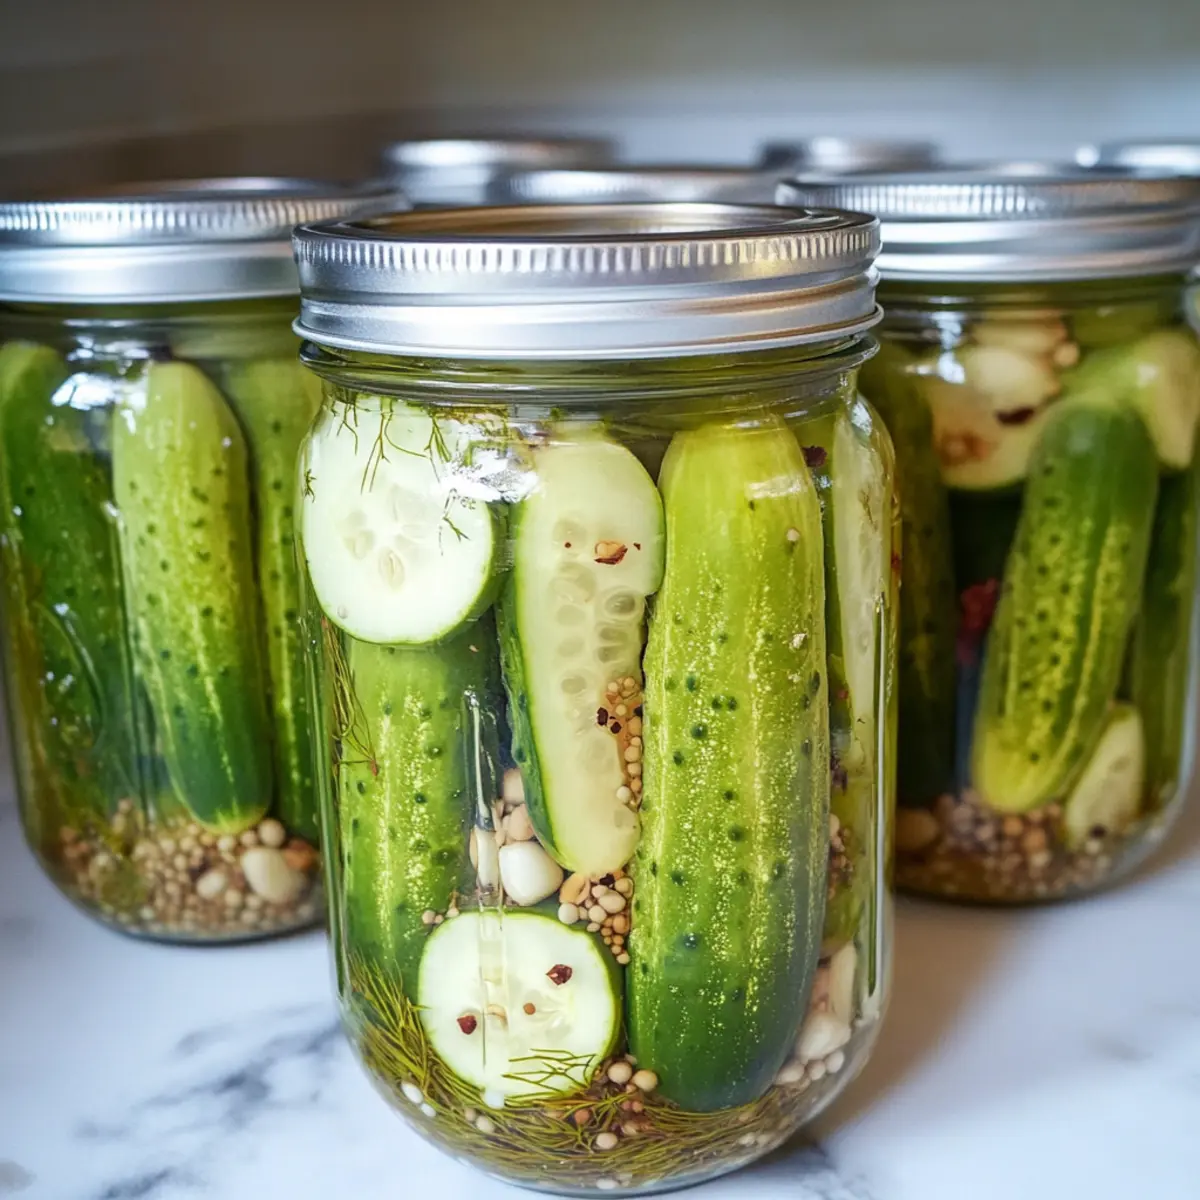
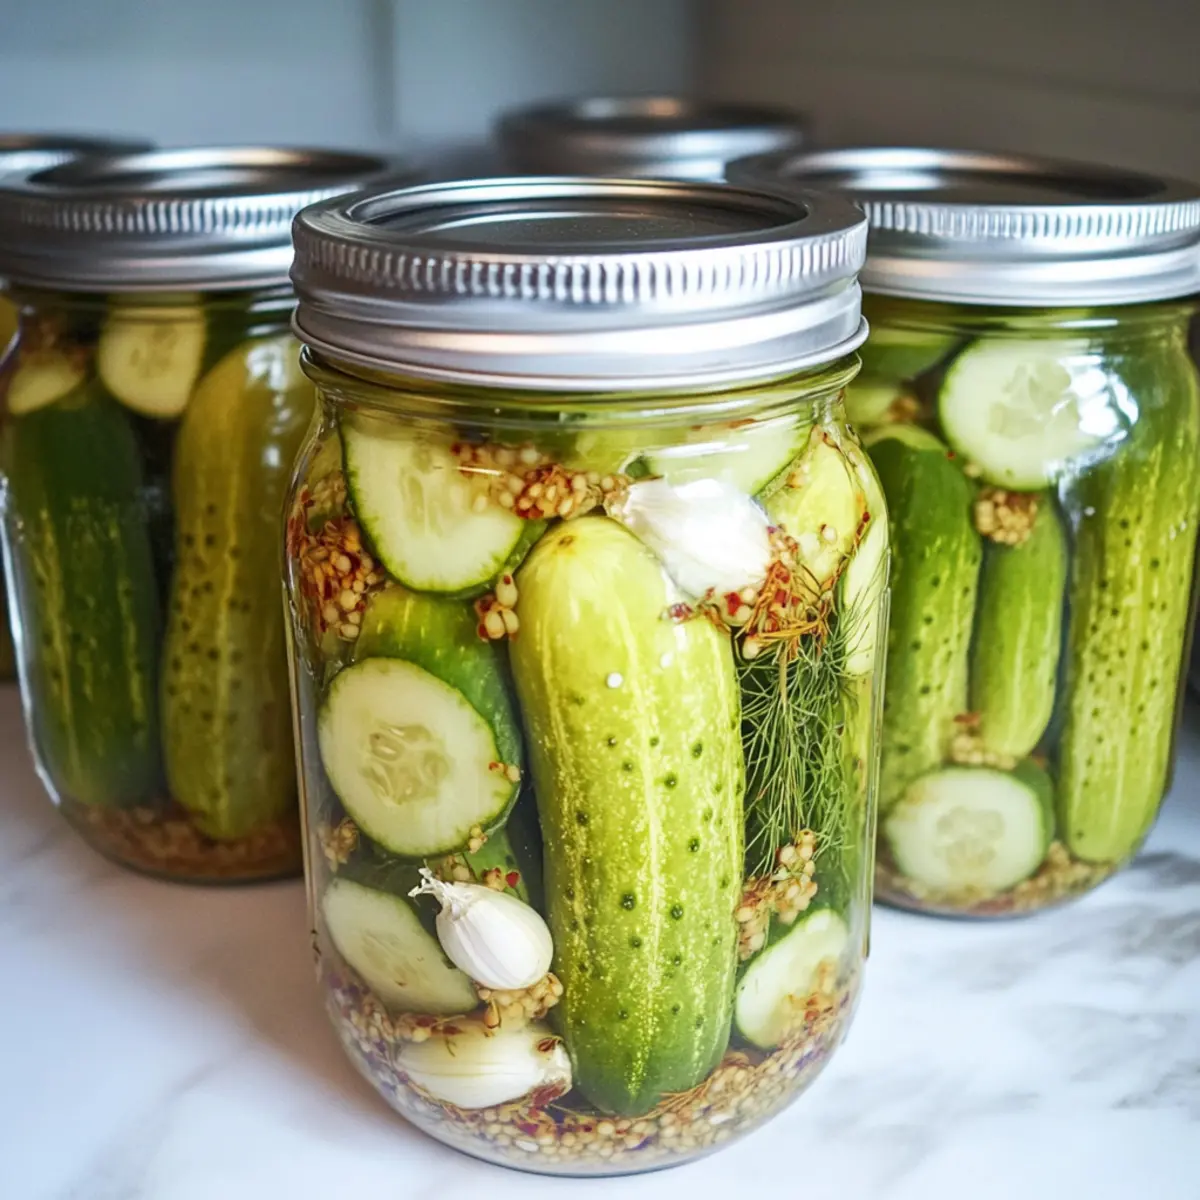
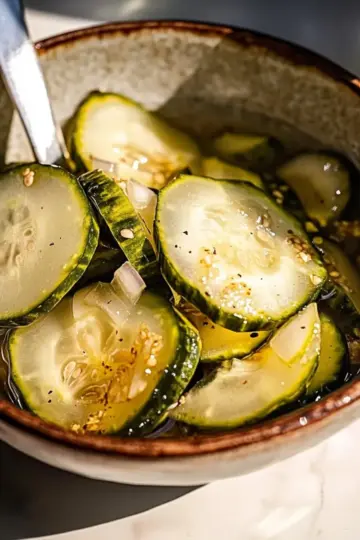
Place sliced garlic cloves, fresh dill heads, and optional red pepper flakes at the bottom of each sterilized jar. Feel free to adjust the amount of garlic based on your preference for a garlicky kick. The combination of these flavors will infuse beautifully into the cucumbers, setting the stage for your Refrigerator Garlic Dill Pickles.
Step 3: Pack the Cucumbers
Carefully pack the pickling cucumbers tightly into each jar, ensuring they are snug and vertical. Choose small cucumbers for that ideal crunch. The tighter they are packed, the better the flavor will permeate. Leave some space at the top to pour in your brine mixture later without overflowing.
Step 4: Make the Brine
In a medium saucepan, combine cider vinegar, water, pickling spices, pickling salt, and sugar. Heat over medium-high heat, stirring until the sugar and salt are dissolved. Bring the mixture to a boil, then reduce the heat and simmer for 5 minutes. You’ll notice a fragrant aroma filling the kitchen as the brine comes together for your crunchy pickles.
Step 5: Fill the Jars
Ladle the hot brine over the tightly packed cucumbers in each jar, ensuring that they are fully submerged. Leave about ¼-inch of headspace at the top to allow for expansion as they cool. The vibrant brine should cover all the cucumbers, ensuring they soak up all that garlicky flavor.
Step 6: Cool and Store
Allow the filled jars to cool at room temperature for about an hour. Once they have cooled down, label each jar with the date and place them in the refrigerator. This waiting period is essential for flavor development, as the brine seeps into the cucumbers for your delightful Refrigerator Garlic Dill Pickles.
Step 7: Wait to Enjoy
Patience is key! Wait for 3-4 weeks before indulging in your pickles to allow the flavors to deepen and meld. The longer they sit, the more intense the garlic and dill flavor becomes, transforming your cucumbers into delicious crunchy snacks. When ready, savor the vibrant crunch of your homemade Refrigerator Garlic Dill Pickles!
Expert Tips for Refrigerator Garlic Dill Pickles
• Cucumber Choice: Use the smallest pickling cucumbers for the ultimate crunch that makes your refrigerator garlic dill pickles irresistible.
• Avoid Blossom End: Don’t cut off the blossom end of the cucumbers, as this can cause them to become soft.
• Maintain Acidic Balance: When altering any ingredients, keep an eye on the vinegar-water ratio to ensure your pickles stay safe and crisp.
• Labels Matter: Remember to label your jars with the date made. This will help you track how long they've been stored in the fridge for optimal flavor.
• Flavor Infusion: Let your pickles sit for at least 3-4 weeks before trying them; they get tastier as they marinate in the brine.
Make Ahead Options
These Easy Refrigerator Garlic Dill Pickles are ideal for meal prep enthusiasts! You can prepare the brine up to 24 hours in advance and store it in the refrigerator. To get started, simply sterilize your jars and slice your garlic and dill, then keep them ready in the jars. When you’re ready to make your pickles, pack the cucumbers into the jars, pour the cold brine over them, and seal. This method not only saves time on busy days but also helps the flavors develop beautifully. Remember, wait 3-4 weeks after making them for the garlic dill flavor to reach its peak. Your homemade refrigerator garlic dill pickles will be just as delicious and fresh!
Storage Tips for Refrigerator Garlic Dill Pickles
Fridge: Store your refrigerator garlic dill pickles in the refrigerator, where they will stay delicious and crunchy for up to a year. For optimal flavor, enjoy them within 9-12 months.
Airtight Containers: Use tight-sealing jars to keep your pickles fresh and to prevent any absorption of odors from the fridge.
Cool Down: Allow the jars to cool to room temperature before placing them in the fridge. This helps maintain crispness and flavor.
Reheating: Not applicable for pickles, as they're best enjoyed cold straight from the refrigerator.
What to Serve with Easy Refrigerator Garlic Dill Pickles
Elevate your meal experience with delightful sides that perfectly complement the crunchy, garlicky goodness of your pickles!
-
Classic Sandwiches: Elevate any deli sandwich with the crisp tang of pickles. They add an appetizing crunch that brightens every bite.
-
Charcuterie Board: Pair with cheeses, cured meats, and nuts for a stunning spread. The pickles’ acidity cuts rich flavors, creating a balanced tasting experience.
-
Potato Salad: Serve alongside creamy potato salad, which blends familiar flavors. The tang of the pickles adds a refreshing twist to every mouthful.
-
Grilled Meats: Complement burgers and barbecue chicken with the freshness of pickles. They enhance the savory, smoky flavors, bringing an exciting contrast to your plate.
-
Tacos: Add a zesty pop to tacos! The garlic dill notes harmonize beautifully with spicy and savory taco fillings, delivering a burst of flavor.
-
Garden Salad: Toss pickles into fresh garden salads for added crunch. Their acidity balances creamy dressings, enhancing the overall flavor profile.
-
Beer and Cider: Enjoy with a cold beer or tangy cider. The bubbly drinks pair well, cleansing the palate in between bites of crunchy pickles.
-
Fruit Salad: Surprise your guests by serving a side of fresh fruit salad. The sweetness contrasts nicely with pickles, making each mouthful more vibrant.
-
Dessert Pairing: Think about a light apple tart. The sweet and tart elements can accentuate the acidity of the pickles, making for an unexpected pairing adventure!
Refrigerator Garlic Dill Pickles Variations
Feel free to get creative with these delicious pickles and adapt the flavors to suit your taste buds!
-
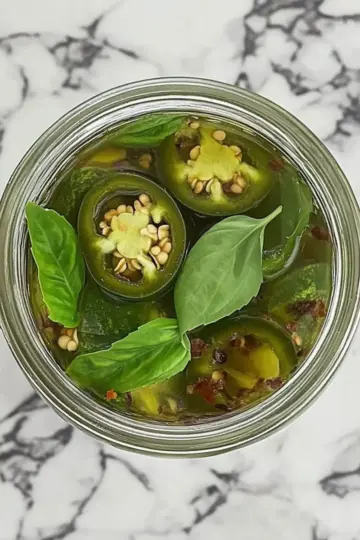
Spicy Kick: Add extra red pepper flakes or thinly sliced jalapeños for a fiery twist. Enjoy the heat mingling with the tangy brine!
-
Herb Infusion: Substitute fresh dill with other herbs like thyme or tarragon for a unique flavor profile. Each herb brings its own delightful essence to the party.
-
Sweet & Spicy: Increase the sugar for a sweeter pickle or incorporate sweet peppers for a lovely contrast to the garlic. The balance will make your taste buds dance with joy!
-
Extended Crunch: Add sliced carrots or radishes along with your cucumbers for delightful texture and color. These additions not only look pretty but also boost the crunch factor!
-
Smoky Flavor: Introduce a bit of smoked paprika or liquid smoke to the brine for a deep, smoky essence. This will elevate your refrigerator garlic dill pickles to a whole new level of delicious!
-
Garlic Lovers: Amp up the garlic by adding whole cloves or roasted garlic for an intensely flavorful experience. Every bite becomes a garlicky delight that enhances your kitchen nostalgia.
-
Zesty Citrus: Infuse the brine with lemon or lime zest for a refreshing citrusy twist. It adds a bright note that complements the dill and garlic beautifully.
-
Pickle Variations: Experiment with different vegetable combinations, such as green beans or cauliflower, to create mixed vegetable refrigerator pickles. These vibrant options offer a delightful assortment in every jar!
For more exciting garlic flavors, you might want to check out these recipes: Garlic Butter Steak and Garlic Parmesan Chicken. Enjoy experimenting with your pickles!
Easy Refrigerator Garlic Dill Pickles Recipe FAQs
What type of cucumbers should I use for refrigerator garlic dill pickles?
I recommend using small pickling cucumbers, as they have the perfect crunch and texture for pickling. Look for firm, blemish-free cucumbers, avoiding any with dark spots or excessive softness.
How should I store my refrigerator garlic dill pickles?
Store your pickles in the refrigerator in airtight, sterilized jars. They will stay fresh and crunchy for up to a year, but for the best flavor, it's ideal to consume them within 9-12 months. Always remember to label the jars with the date made!
Can I freeze refrigerator garlic dill pickles?
Freezing is generally not recommended for refrigerator garlic dill pickles, as it can alter their crunchy texture and flavor. If you have an excess batch, consider sharing with friends or family instead! They'll love you for it!
What should I do if my pickles are overly soft?
If your pickles turn out soft, it could be due to a few factors like using older cucumbers or cutting off the blossom end. To maintain crispness, opt for the freshest and smallest cucumbers, and always keep the blossom end intact. For future batches, you can add a few grape leaves which naturally contain tannins to help keep pickles crisp.
Are refrigerator garlic dill pickles safe for pets or allergies?
While refrigerator garlic dill pickles are safe for human consumption, it's best to avoid sharing them with pets, as garlic can be toxic to dogs and cats. If you're concerned about allergies, please verify the specific ingredients you’re using, particularly regarding vinegar or spices.
Crunchy Refrigerator Garlic Dill Pickles Perfect for Snacking
Ingredients
Equipment
Method
- Sterilize the jars to ensure freshness and safety.
- Place sliced garlic, fresh dill, and red pepper flakes at the bottom of each jar.
- Carefully pack the pickling cucumbers tightly into each jar.
- In a saucepan, combine cider vinegar, water, pickling spices, salt, and sugar. Heat until dissolved and then simmer for 5 minutes.
- Ladle the hot brine over the packed cucumbers and leave space at the top.
- Allow the jars to cool at room temperature for about an hour.
- Wait for 3-4 weeks before enjoying for flavor development.
Leave a Reply