
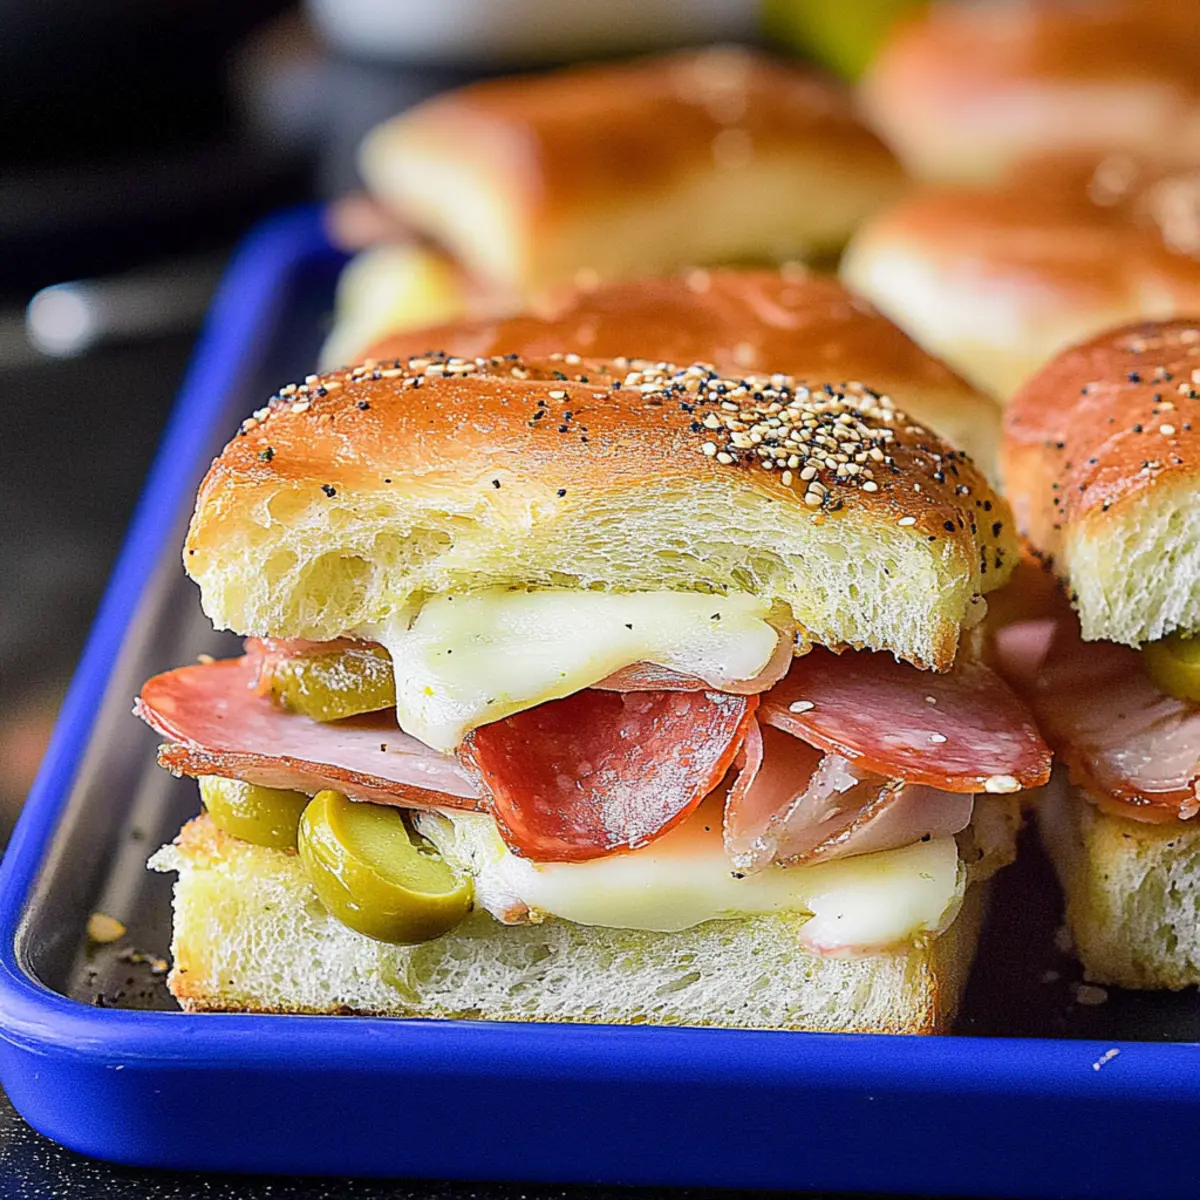
“Why order fast food when you can whip up something delicious in no time?” These Hot Italian Sub Sliders are my answer to that question, and trust me, they’ll be a hit at your next tailgate or gathering! Combining savory deli meats with gooey melted cheese, these sliders are effortlessly assembled and bake to perfection in just 30 minutes. Not only are they a crowd-pleaser, but they also make for a fantastic weeknight dinner option when you're short on time. Picture serving these golden-brown delights drizzled with marinara sauce for dipping—your loved ones will be singing your praises! Curious about how to create this cheesy, flavor-packed dish? Let’s dive into the recipe!
Why Make Hot Italian Sub Sliders?
Simplicity at Its Finest: These sliders come together effortlessly, making them perfect for both novice cooks and seasoned chefs alike.
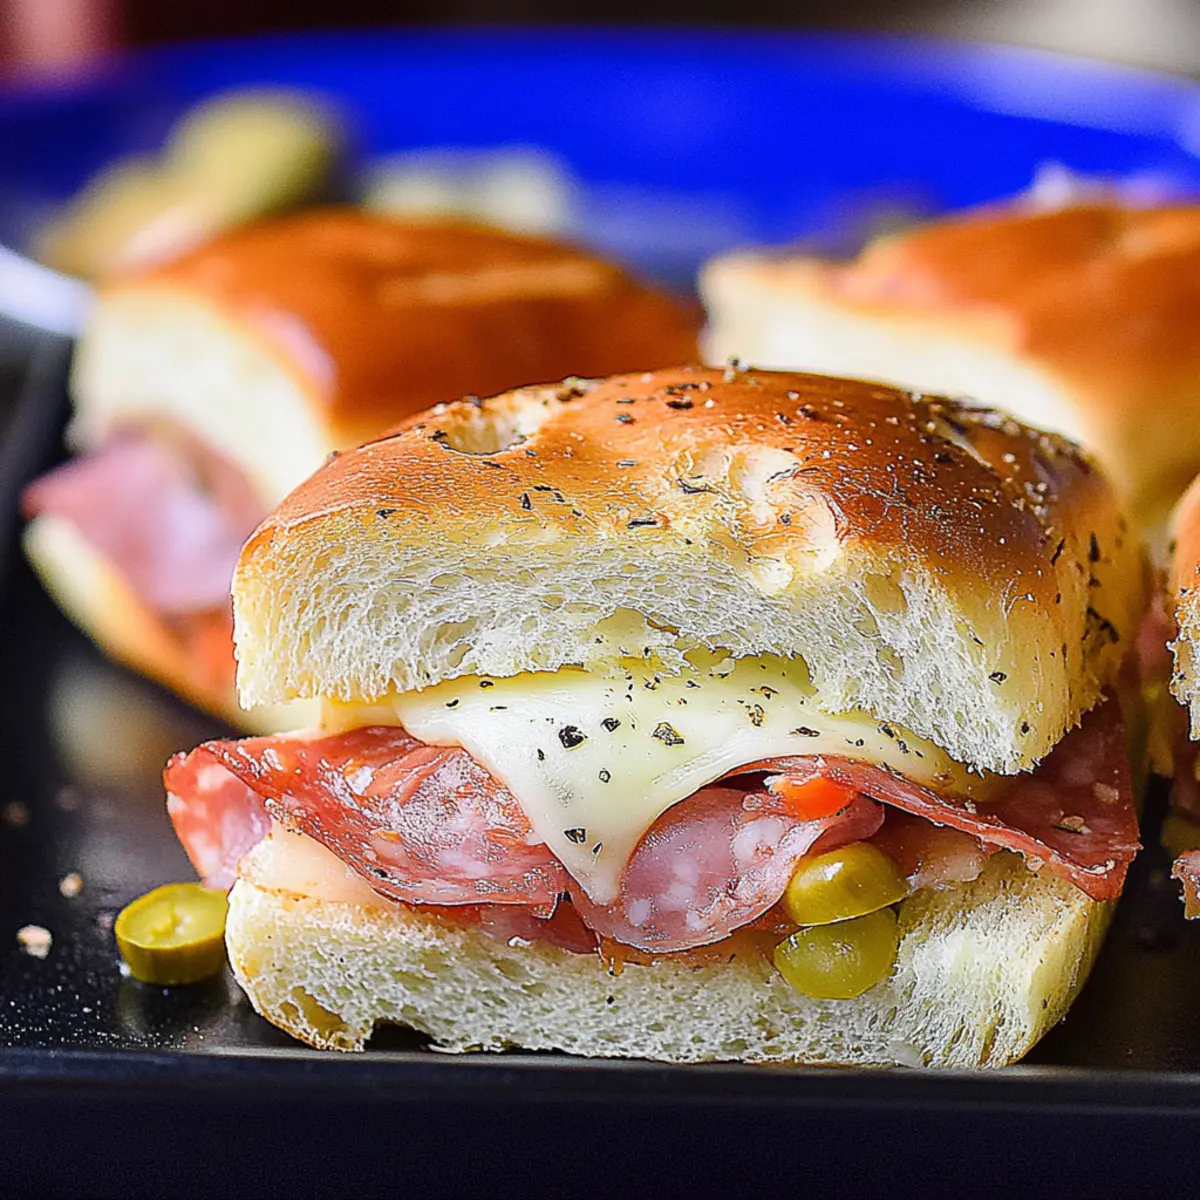
Cheesy Goodness: Each bite is loaded with melty provolone and the perfect blend of savory meats, ensuring every family member will be requesting seconds.
Quick Baking Time: Ready in just 30 minutes, this dish saves you from the hassle of takeout while still providing a warm, satisfying meal.
Crowd-Pleaser: Whether it’s for tailgating or a casual dinner, these sliders are a guaranteed hit at any gathering. Consider pairing them with a refreshing salad or chips for a well-rounded meal!
Versatile Flavors: Feel free to swap in your preferred meats or cheeses; this recipe can easily be customized to suit your taste, just like my Baked Italian Vegetable dish!
Dipping Delight: Serve with marinara sauce on the side for an extra layer of flavor—perfect for dipping and dunking!
Hot Italian Sub Sliders Ingredients
When it comes to creating irresistible Hot Italian Sub Sliders, having the right ingredients is key to achieving that melt-in-your-mouth experience. Here’s what you’ll need:
For the Sliders
- Kings Hawaiian Rolls – These soft rolls are sweet and delightful; any similar dinner rolls can be used in a pinch.
- Ham (6 oz, thinly sliced) – Provides a savory and slightly sweet flavor; turkey or roast beef are excellent alternatives.
- Salami (5 oz, thinly sliced) – Adds a robust flavor to your sliders; consider turkey salami for a lighter option.
- Pepperoni (5 oz, thinly sliced) – Delivers a spicy, bold kick; Canadian bacon offers a milder taste if preferred.
- Provolone Cheese (9 slices) – Melts beautifully for creaminess; swap with mozzarella for a milder cheese profile.
- Pepperoncini (⅓ cup, sliced) – Introduces a tangy flavor; mild banana peppers can substitute if you want less heat.
- Pickled Hot Cherry Peppers (⅓ cup, sliced) – Provides heat and sweetness; roasted red peppers can be used for a milder flavor.
For the Topping
- Salted Butter (¼ cup, melted) – Adds richness and helps achieve that golden-brown finish; vegan butter works as a lactose-free alternative.
- Italian Seasoning (1 tsp) – Enhances flavor depth; fresh basil or oregano make great substitutions.
- Garlic (2 cloves, crushed) – Lends aromatic flavor; garlic powder can be used in a pinch, but fresh is always best.
For Serving
- Marinara Sauce (1 cup, optional) – Complements the sliders beautifully; any tomato-based dipping sauce works well.
With these ingredients at your fingertips, you're well on your way to mastering the art of making Hot Italian Sub Sliders that everyone will adore!
Step‑by‑Step Instructions for Hot Italian Sub Sliders
Step 1: Preheat Oven
Begin by preheating your oven to 350°F (175°C). This ensures a perfectly baked exterior for your Hot Italian Sub Sliders. While the oven heats up, gather your ingredients and prepare your baking sheet for assembly. You’ll want to have all your deli meats and cheese ready to go for a smooth process.
Step 2: Assemble Sliders
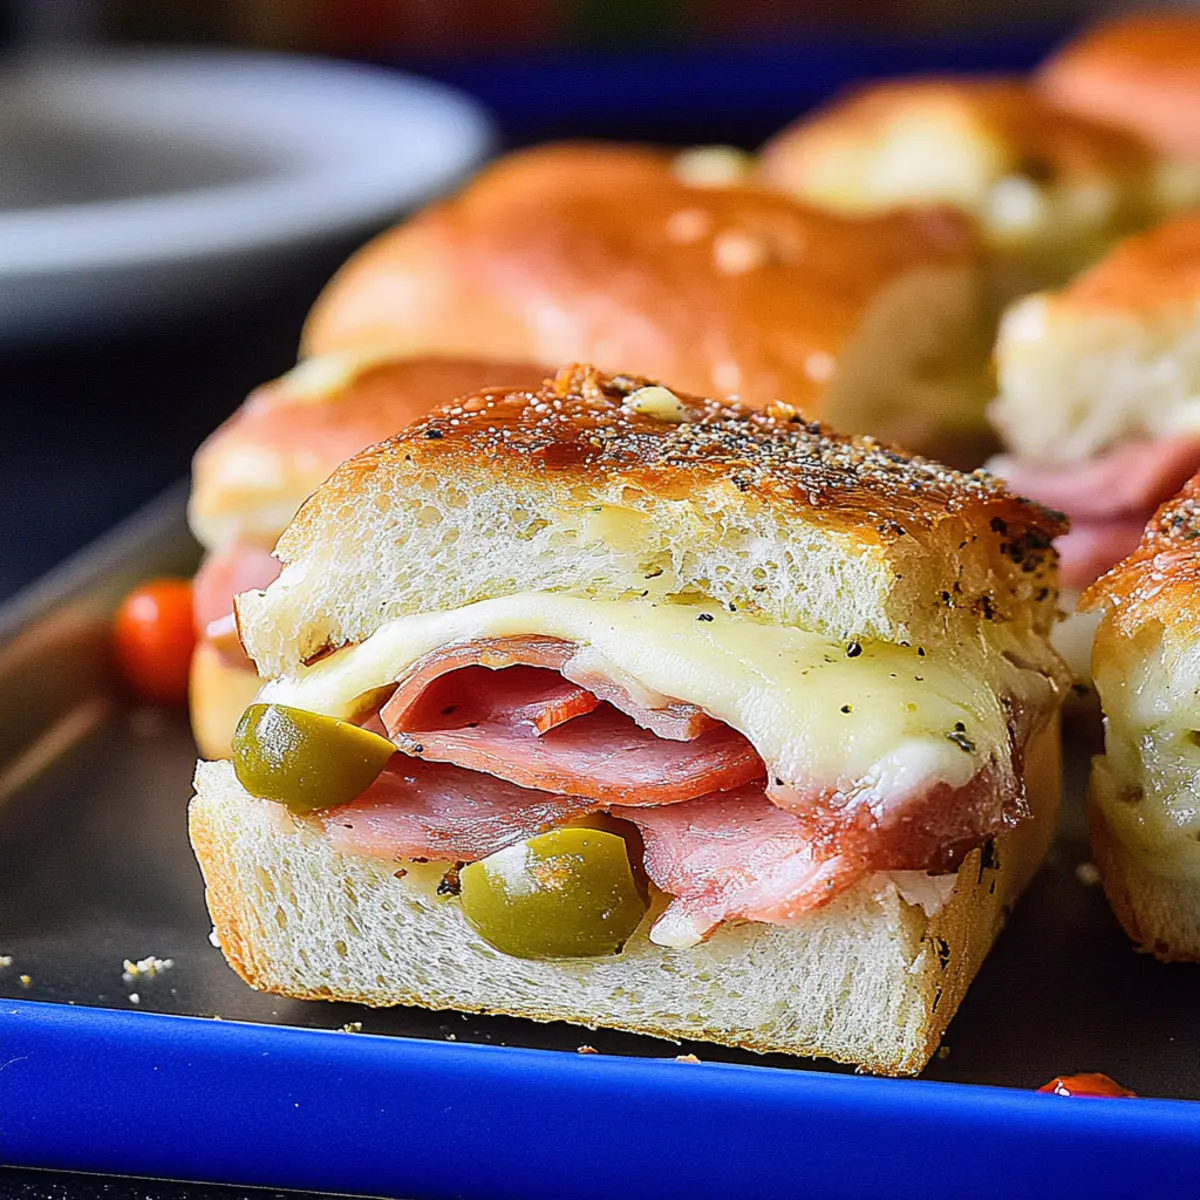
On a large baking sheet, place the bottom half of the Kings Hawaiian Rolls side by side. Start layering the flavors by adding the thinly sliced ham, salami, and pepperoni, covering the rolls generously. Next, arrange the provolone cheese slices on top, followed by the pepperoncini and pickled hot cherry peppers to infuse that zesty kick. Finally, close with the top half of the rolls, creating a delightful slider sandwich.
Step 3: Prepare Butter Mixture
In a small bowl, mix the melted salted butter, Italian seasoning, and crushed garlic until well combined. This rich mixture will provide a flavorful topping that enhances the taste of your Hot Italian Sub Sliders. Make sure to stir thoroughly so that the garlic and herbs are evenly distributed throughout the butter.
Step 4: Brush Butter
Using a pastry brush, generously coat the top of the assembled sliders with the seasoned butter mixture. Ensure every corner of the rolls is covered for that golden, crispy finish. You should see the liquid cascading over the edges, promising delightful flavors in every bite of your sliders once baked.
Step 5: Cover and Bake
Cover the assembled sliders with aluminum foil to trap the heat and moisture. Place them in the preheated oven and bake for 30 minutes, or until the tops are golden brown and the cheese is thoroughly melted. You’ll want to keep an eye on them—look for that irresistible bubbly cheese, signaling a scrumptious treat coming your way.
Step 6: Slice and Serve
Once baked, remove the sliders from the oven and uncover them carefully to avoid steam burns. Allow them to cool for a few minutes, then slice through the rolls to create individual sliders. Serve warm with marinara sauce on the side, perfect for dipping. Your friends and family will be thrilled with this tasty version of Hot Italian Sub Sliders!

Storage Tips for Hot Italian Sub Sliders
Room Temperature: Store leftover sliders at room temperature for up to 2 hours if they won’t be eaten right away. After this period, refrigerate to prevent spoilage.
Fridge: Keep sliders in an airtight container in the fridge for up to 3 days. Reheat in the oven at 350°F until warmed through, ensuring the cheese melts nicely again.
Freezer: For longer storage, freeze individual sliders wrapped tightly in plastic wrap and aluminum foil for up to 2 months. Thaw overnight in the fridge before reheating.
Reheating: Reheat frozen sliders at 350°F for about 15-20 minutes until heated through and the cheese is melty. Perfect for a quick meal anytime!
Hot Italian Sub Sliders Variations
Feel free to get creative with these sliders; customization is key to making this dish uniquely yours!
- Dairy-Free: Use a lactose-free cheese alternative and swap butter for vegan butter to cater to dairy concerns. Everyone deserves to experience the joy of sliders!
- Spicy Kick: Add jalapeños or crushed red pepper flakes for an extra layer of heat, elevating the flavors in every delightful bite.
- Veggie Version: Replace all meats with grilled vegetables and add extra cheese for a hearty vegetarian twist. This way, you can enjoy the flavors without compromising on taste!
- Flavorful Cheeses: Swap provolone for sharp cheddar or a creamier gouda. Each cheese will bring a new taste experience that will have your guests reaching for seconds.
- Garlic Lovers: Incorporate roasted garlic into the butter mixture for a deeper, richer flavor profile that will keep everyone coming back for more.
- Herb Infusion: Toss in fresh herbs like basil or parsley directly into the butter mix for a fragrant touch that complements the fillings beautifully. If you love fresh flavors, this one’s for you!
- Fancy Sliders: Elevate your sliders by adding bruschetta toppings before serving; those delightful tomatoes and basil pairs wonderfully with the savory meats.
- Double the Flavor: Layer two types of meats instead of one—mix ham with salami or pepperoni for a double-meat delight! Why not indulge when you can?
For more tasty recipes and inspiration, check out my Baked Italian Vegetable dish that highlights how you can turn classic ingredients into fabulous meals!
Make Ahead Options
These Hot Italian Sub Sliders are a fantastic option for meal prep, allowing you to save time during busy weekdays or for your next gathering. You can assemble the sliders up to 24 hours in advance; simply layer all the ingredients and cover the baking dish tightly with foil or plastic wrap to prevent drying out. For extra convenience, consider preparing the butter mixture and refrigerating it separately until you're ready to bake. When you're ready to serve, just take the sliders out of the fridge, brush on the prepared butter, and bake them directly in a preheated oven for about 30-35 minutes. This way, you can enjoy delicious, homemade sliders with a crispy top that are just as delectable as if you made them fresh that day!
What to Serve with Hot Italian Sub Sliders
Elevate your meal with delightful pairings that complement those cheesy, savory bites your family will love.
-
Crispy Potato Chips: The crunch balances the softness of the sliders, adding a satisfying texture contrast that's always a hit.
-
Fresh Garden Salad: Light and refreshing, a salad filled with mixed greens and a tangy vinaigrette complements the rich flavors of the sliders beautifully.
-
Roasted Veggies: Seasoned and caramelized vegetables bring a healthy twist while enhancing the savory notes of the Italian meats.
-
Garlic Breadsticks: With their buttery, garlicky goodness, these are perfect for dipping into that marinara sauce paired with the sliders.
-
Classic Coleslaw: This crunchy and creamy side adds a refreshing contrast, making every bite of the sliders that much more enjoyable.
-
Italian Soda: A fizzy and slightly sweet beverage to cleanse your palate between bites and keep the tailgate spirit alive.
-
Cheesy Garlic Knots: A delicious twist on bread, these elevate your meal further with more cheesy goodness to savor alongside your sliders.
-
Dark Chocolate Brownies: End your meal with a rich, fudgy dessert that satisfies any sweet tooth, making it a perfect finish to a hearty dish.
Expert Tips for Hot Italian Sub Sliders
-
Butter is Essential: Don’t skip the butter topping! It creates a crispy, golden finish that elevates the flavor of your sliders.
-
Layer Wisely: Layer meats and cheese evenly to ensure every slider is packed with flavor. Avoid overstuffing, which can make assembly difficult.
-
Ingredient Substitutions: Feel free to swap in your favorite deli meats or cheeses, but maintain the balance of flavors to keep the essence of these Hot Italian Sub Sliders intact.
-
Oven Time: If your sliders are coming straight from the fridge, add an extra 5-10 minutes to the baking time. This ensures everything is heated through.
-
Make-Ahead Magic: Prepare sliders a few hours in advance, cover them, and chill until you're ready to bake. This saves time when your guests arrive!
Hot Italian Sub Sliders Recipe FAQs
What is the best way to select ripe ingredients for the Hot Italian Sub Sliders?
Absolutely! For optimal flavor, choose deli meats that look fresh and are free from discoloration or dark spots. When selecting peppers, look for vibrant colors without any wrinkles. The Kings Hawaiian Rolls should be soft and moist, not dry or hard, ensuring the best bite experience.
How should I store leftover Hot Italian Sub Sliders, and how long do they last?
The more the merrier! Keep any leftover sliders in an airtight container in the fridge for up to 3 days. Remember to let them cool completely before sealing to prevent condensation. If you forget, they may become soggy—yikes!
Can I freeze Hot Italian Sub Sliders, and how do I do it?
Yes, you can definitely freeze them! Individually wrap the sliders tightly in plastic wrap and then in aluminum foil to prevent freezer burn. They’ll last for up to 2 months in the freezer. When ready to enjoy, simply thaw them overnight in the fridge before reheating in the oven at 350°F for about 15-20 minutes.
What do I do if my sliders are not browning properly during baking?
If your Hot Italian Sub Sliders aren’t browning as expected, it may be due to inadequate moisture or not enough butter on top. Make sure to coat the tops evenly with the buttery mixture before baking. Additionally, you might want to remove the foil during the final 5-10 minutes to allow for that golden finish.
Are the Hot Italian Sub Sliders suitable for people with allergies or dietary restrictions?
Absolutely! You can customize these sliders to cater to dietary needs. If gluten is a concern, opt for gluten-free rolls and ensure your deli meats are certified gluten-free. For dairy-free options, vegan butter and non-dairy cheese can effectively replace traditional ingredients. Furthermore, always check the labels of your ingredients to avoid allergens like nuts or soy!
How long does it take to prepare the Hot Italian Sub Sliders ahead of time?
You can prepare these sliders a few hours in advance! Simply assemble everything as instructed, cover them tightly, and store in the fridge until you're ready to bake. This saves you time at the party or tailgate, and allows the flavors to meld beautifully while you finish your last-minute details!
Irresistible Hot Italian Sub Sliders for Your Next Tailgate
Ingredients
Equipment
Method
- Preheat your oven to 350°F (175°C). Gather ingredients and prepare your baking sheet.
- On a large baking sheet, place the bottom half of the Kings Hawaiian Rolls side by side. Layer ham, salami, and pepperoni on the rolls.
- Arrange provolone slices on top, followed by pepperoncini and pickled hot cherry peppers. Close with the top half of the rolls.
- In a small bowl, mix melted butter, Italian seasoning, and crushed garlic until combined.
- Brush the top of the assembled sliders generously with the butter mixture.
- Cover with aluminum foil and bake for 30 minutes until golden brown and cheese is melted.
- Remove, let cool for a few minutes, then slice and serve with marinara sauce.


Leave a Reply