
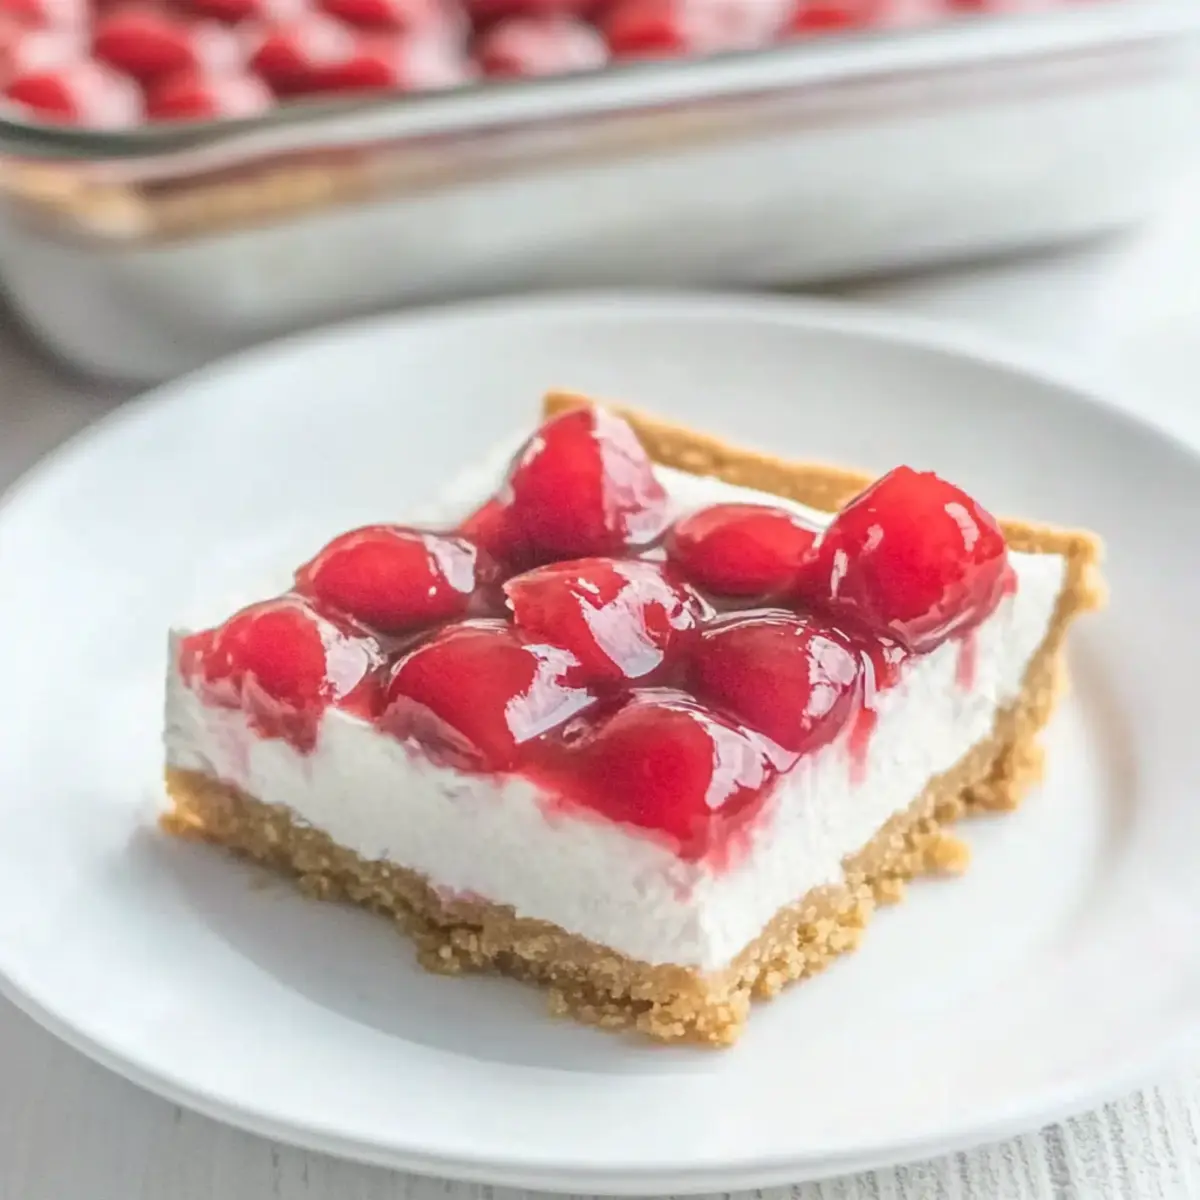
The warm sun beats down, and I find myself craving something light and refreshing—enter my No Bake Cherry Cheesecake! This delightful summer dessert combines a creamy filling with a crisp, buttery graham cracker crust, creating a no-fuss treat that’s perfect for warm days. The best part? This recipe is a breeze to whip up, ensuring that you can keep your cool in the kitchen while delivering a show-stopping dessert that everyone will adore. Plus, it’s remarkably versatile; feel free to swap out the cherries for your favorite fruit filling like blueberries or pineapples for a fun twist! Ready to embrace a delicious way to beat the heat? Let’s dive into this no bake adventure!
Why is No Bake Cherry Cheesecake a Must-Try?
Simplicity at its Best: This dessert requires no oven time, making it a hassle-free option for hot summer days.
Crowd-Pleasing Delight: With creamy filling and a crunchy crust, it's sure to impress at gatherings.
Versatile Flavor Combinations: Swap the cherry topping for any fruit filling like blueberry or pineapple to suit your taste.
Quick and Easy: Prep is a breeze, meaning you can spend less time in the kitchen and more time enjoying the sun.
Refreshing Texture: The lightness of the cream pairs beautifully with the tangy fruit, creating a delightful treat that won’t weigh you down. If you enjoy this recipe, be sure to try our delicious Burnt Basque Cheesecake or opt for a comforting Baked Italian Vegetable Lasagna as a main dish!
-
Ingredients
• • No Bake Cherry Cheesecake Ingredients -
For the Crust
- Crushed graham crackers – The crispy base that gives structure; substitute with gluten-free options for a gluten-free treat.
- Melted butter – Binds the crust together; use coconut oil for a dairy-free alternative.
- Granulated sugar – Sweetens the crust; brown sugar can add a rich flavor.
- For the Filling
- Cream cheese – Provides a rich, creamy texture; ensure it's softened for easy blending.
- Whipped cream topping – Adds lightness to the filling without overpowering; homemade is even fresher!
- Powdered sugar – Sweetens and stabilizes the filling.
- Almond extract – Enhances flavor; substitute with vanilla extract if desired.
- For the Topping
- Cherry pie filling – The sweet layer on top; in-season fresh cherries can be used for a delightful twist.
This No Bake Cherry Cheesecake is not just a treat; it’s a family-friendly delight that can be customized to suit any palate!
Step‑by‑Step Instructions for No Bake Cherry Cheesecake
Step 1: Prepare the Crust
Begin by mixing 1 and ½ cups of crushed graham crackers, ½ cup of melted butter, and ¼ cup of granulated sugar in a medium bowl until well combined. Using a spatula or your hands, press this mixture firmly into the bottom of a 9x13-inch pan to form an even crust. Aim for a slightly compact but still crumbly texture, then set aside while you make the filling.
Step 2: Blend the Filling
In a large mixing bowl, beat 8 ounces of softened cream cheese with an electric mixer on medium speed until completely smooth, about 1-2 minutes. Gradually add 1 cup of powdered sugar and ½ teaspoon of almond extract, mixing until everything is well integrated. The mixture should be creamy and free of lumps, giving you a rich base for your No Bake Cherry Cheesecake.
Step 3: Fold in Whipped Cream
Gently fold in 1 cup of whipped cream topping into the cream cheese mixture using a rubber spatula. Be careful not to deflate the whipped cream; the goal is to maintain its lightness. This step adds a fluffy texture to the filling, which will complement the tangy cherry topping beautifully.
Step 4: Assemble the Cheesecake
Carefully spread the cream cheese mixture over the prepared graham cracker crust with an offset spatula, ensuring an even layer. Take your time to smooth the surface, making it look visually appealing for your No Bake Cherry Cheesecake. Once you’ve done this, prepare for the final touch with the cherry topping.
Step 5: Add the Cherry Topping
Open your can of cherry pie filling and gently spoon it over the cream cheese layer, ensuring it covers the surface completely. Use a spatula to spread the filling evenly if necessary, creating a luscious red layer on top of your cheesecake. The vibrant cherries will be the star of this refreshing summer treat!
Step 6: Chill to Set
Cover the assembled No Bake Cherry Cheesecake with plastic wrap and place it in the refrigerator to chill for at least 2 hours, or ideally overnight. This chilling time allows the flavors to meld and the filling to firm up, ensuring a perfect slice when you're ready to serve. The dessert should be cold and set with a pleasing texture.
Step 7: Serve and Enjoy
Once set, cut the cheesecake into squares and serve chilled. For an extra touch, consider adding a dollop of whipped cream or a sprinkle of crushed nuts on top before serving. Enjoy the delightful blend of creamy filling and tangy cherries in this refreshing summer treat!
Storage Tips for No Bake Cherry Cheesecake
- Fridge: Cover the cheesecake with plastic wrap or aluminum foil and refrigerate for up to 3 days. This keeps it fresh while preserving the creamy texture.
- Freezer: It’s best not to freeze your No Bake Cherry Cheesecake, as the texture may change when thawed. The creamy filling can become watery and lose its delightful consistency.
- Serving: For the best experience, serve chilled and consider topping with fresh whipped cream right before serving for a lovely presentation.
- Reheating: There’s no need to reheat this dessert—simply enjoy it straight from the fridge for a refreshing treat on warm days!
No Bake Cherry Cheesecake Variations
Feel free to get creative with this recipe and explore different flavor combinations that will tantalize your taste buds!
-
Tropical Twist: Substitute cherry pie filling with fresh pineapple chunks for a tropical vibe. The sweet and tangy combo will transport you to a sunny beach!
-
Berry Burst: Swap out for blueberry pie filling for a delightful change of pace. The vibrant color and fruity flavor will make your cheesecake pop!
-
Chocolate Indulgence: Add cocoa powder to the cream cheese filling or use chocolate graham crackers for the crust. Imagine a rich chocolaty flavor contrasting with the fruity topping!
-
Nutty Delight: Fold in crushed nuts like pecans or walnuts to the crust for added crunch and a delightful texture twist. It’ll give your cheesecake an irresistible nutty richness.
-
Creamy Vanilla: Replace almond extract with pure vanilla extract for a classic flavor profile that allows the cherries to shine. Simple but oh-so-delicious!
-
Caramel Drizzle: Drizzle caramel sauce over the cherry topping for a sweet finishing touch. The combination of caramel with cherries is simply divine!
-
Mixed Fruit Medley: Experiment with a mix of different fruit fillings for a colorful and vibrant cheesecake. Think cherry, blueberry, and raspberry for a delicious medley!
-
Citrus Zing: Incorporate lemon zest into the cream cheese mixture for a hint of citrus. It adds a refreshing twist that complements the cherries wonderfully.
Each of these variations is sure to bring a unique flair to your No Bake Cherry Cheesecake. For more delightful desserts, don’t forget to check out our Soft Baked Maple Donut Bars or try the lovely Velvet Strawberry Cheesecake. Happy baking!
What to Serve with No Bake Cherry Cheesecake Dessert
Indulge in a delightful spread that complements the creamy richness of a no bake cherry cheesecake for an unforgettable summer gathering.
-
Fresh Berries: Serve a medley of strawberries, blueberries, and raspberries for a burst of natural sweetness. Their tartness balances the dessert's richness perfectly.
-
Whipped Cream: A dollop of freshly whipped cream adds a light, airy texture that enhances each bite of cheesecake. It's a classic pairing that feels like a warm hug.
-
Iced Tea: Serve with a refreshing glass of sweetened iced tea, which offers a cool, soothing contrast to the creamy cheesecake. It’s a thirst quencher on hot summer days.
-
Lemonade: Bright, tangy lemonade cuts through the richness while offering a refreshing sip that perfectly complements the fruity flavor of the cheesecake.
-
Chocolate Bark: A side of dark chocolate bark provides a rich, crunchy contrast, adding a layer of decadence to your dessert table while balancing the fruitiness with its deep cocoa flavor.
-
Coconut Macaroons: These chewy treats can add a tropical flair that echoes the vacation vibes of summer, pairing wonderfully with the cherry filling while introducing delightful texture.
Feel free to mix and match these delightful pairings, creating a feast that your guests will remember long after the last bite!
Expert Tips for No Bake Cherry Cheesecake
-
Cream Cheese Consistency: Make sure the cream cheese is completely softened to achieve a smooth filling without lumps, which can result in a less enjoyable texture.
-
Chill Time Matters: Allow your cheesecake to chill for at least 2 hours, but overnight is best for flavors to meld and the filling to set properly.
-
Avoid Crust Mishaps: When pressing the crust mixture into the pan, aim for firmness without compacting too tightly; the crust needs to hold its shape but remain crumbly.
-
Flavor Variations: Don’t hesitate to switch up the cherry topping; experiment with various fruit pie fillings like pineapple or blueberry to customize your No Bake Cherry Cheesecake.
-
Presentation Tip: For an eye-catching finish, garnish each slice with a dollop of whipped cream or a sprinkle of crushed nuts before serving.
Make Ahead Options
These No Bake Cherry Cheesecake desserts are perfect for busy home cooks looking to save time without sacrificing flavor! You can prepare the graham cracker crust up to 24 hours in advance by mixing the crust ingredients and pressing the mixture into your pan. Store it covered in the refrigerator to maintain its texture. Additionally, the cream cheese filling can be made and kept in the fridge for up to 3 days before serving; simply whip it up, cover tightly, and chill. When you're ready to complete your dessert, spread the filling over the prepared crust and top with cherry pie filling. Then, let it chill for at least 2 hours to set before serving, ensuring that you achieve just as delicious a result! This way, you can easily impress your guests with minimal last-minute effort.
No Bake Cherry Cheesecake Recipe FAQs
How do I choose ripe cherries for the topping?
Absolutely! When selecting cherries, look for ones that are plump with a deep red color. Avoid cherries with dark spots or blemishes, as these are signs of overripeness. Ideally, you want cherries that feel firm to the touch and have a shiny exterior for that perfect fresh taste.
What’s the best way to store No Bake Cherry Cheesecake?
For optimal freshness, cover the cheesecake tightly with plastic wrap or aluminum foil and store it in the refrigerator for up to 3 days. This helps maintain its creamy texture and flavor. If you notice the surface starting to dry out, you can add a layer of whipped cream on top just before serving to brighten it up!
Can I freeze No Bake Cherry Cheesecake?
I generally don’t recommend freezing this cheesecake, as it can alter the texture of the filling. However, if you do want to freeze it, here's how: wrap individual slices tightly in plastic wrap, then place them in an airtight container. It can last in the freezer for up to 2 months. To enjoy, thaw in the refrigerator for a few hours and serve chilled.
What if my filling is too lumpy?
Very! If you end up with a lumpy filling, it’s likely the cream cheese wasn’t softened enough. To fix it, simply transfer the mixture to a blender and blend until smooth. Make sure to scrape down the sides often to incorporate all the ingredients completely. This will restore that rich, creamy texture you’re aiming for!
Is this dessert safe for those with nut allergies?
Yes! The No Bake Cherry Cheesecake is nut-free as written. However, be cautious with any added toppings, like crushed nuts, and make sure your whipped cream doesn’t contain any traces of nuts if you’re serving it to someone with allergies. Always double-check labels if you’re unsure!
Can I use a different fruit filling for this cheesecake?
Absolutely! The beauty of this No Bake Cherry Cheesecake lies in its versatility. Feel free to swap out the cherry pie filling for blueberry, pineapple, or any other favorite fruit filling. Each variation will offer a delightful twist on this refreshing summer treat!
No Bake Cherry Cheesecake That Will Wow Your Summer Guests
Ingredients
Equipment
Method
- Mix the crushed graham crackers, melted butter, and granulated sugar in a bowl until combined. Press firmly into the bottom of a 9x13-inch pan to form an even crust.
- Beat the softened cream cheese with an electric mixer on medium speed until smooth. Gradually add powdered sugar and almond extract, mixing until well integrated.
- Gently fold in the whipped cream topping into the cream cheese mixture using a rubber spatula.
- Spread the cream cheese mixture over the prepared crust and smooth the surface.
- Spoon the cherry pie filling over the cream cheese layer, spreading evenly.
- Cover with plastic wrap and chill in the refrigerator for at least 2 hours, or ideally overnight.
- Once set, cut into squares and serve chilled.


Leave a Reply