
As I flipped through my grandmother's recipe box, a familiar wave of nostalgia washed over me. Tucked between yellowed pages was her secret to crafting the perfect Old-Fashioned Homemade Banana Pudding. This Southern classic is more than just a dessert; it's a heartwarming reminder of family gatherings filled with laughter and love. Made from scratch, this creamy delight layers rich vanilla pudding, crunchy vanilla wafers, and ripe bananas, making it a quick and satisfying option for any occasion. Plus, it’s a crowd-pleaser that’s bound to bring back cherished memories for anyone who enjoys homemade food. Are you ready to recreate this comforting dessert that has stood the test of time?
Why Is This Banana Pudding a Must-Try?
Nostalgic Flavors: This recipe brings back memories of warm family gatherings, where the taste of homemade banana pudding filled the air with sweetness.
Delightfully Simple: With just a few ingredients and easy steps, you’ll have a delicious dessert ready in no time, making it perfect for any occasion.
Uniquely Creamy: The velvety texture created by the rich vanilla pudding and ripe bananas is simply irresistible.
Crowd Favorite: Your guests will be raving about this creamy delight, making it a go-to dessert for potlucks and holidays.
Versatile Layers: Feel free to add your twist by swapping vanilla wafers for graham crackers or even folding in some mashed bananas for extra flavor.
Treat yourself to the comforting joy of classic dessert by making this Southern staple; it's sure to bring smiles to everyone's faces!
Old-Fashioned Homemade Banana Pudding Ingredients
For the Pudding Base
- Sugar – Sugar is essential for sweetness; you can substitute it with brown sugar for a deeper flavor.
- Flour – Flour acts as a thickening agent; if you prefer, use cornstarch at half the amount for a gluten-free option.
- Salt – A pinch of salt enhances overall flavor and balances the sweetness in your pudding.
- Milk – Whole milk provides that creamy texture; non-dairy alternatives like almond or soy milk work well too!
- Eggs – Eggs are critical for richness and thickening; there aren't effective substitutes for a similar texture.
- Vanilla Extract – Use pure vanilla extract for the best flavor, avoiding imitation varieties for that homemade touch.
For the Layers
- Vanilla Wafers (about 8 oz.) – They add that crunchy texture; graham crackers or ladyfingers can serve as delicious alternatives.
- Bananas (4, sliced) – Always choose ripe, yellow bananas to enhance the flavor of your Old-Fashioned Homemade Banana Pudding.
Enjoy crafting this beloved Southern classic, and don't forget to savor every creamy bite!
Step‑by‑Step Instructions for Old-Fashioned Homemade Banana Pudding
Step 1: Combine Dry Ingredients
In a medium saucepan, whisk together 1 cup of sugar, ⅓ cup of flour, and a pinch of salt until well blended. This mixture will form the base of your Old-Fashioned Homemade Banana Pudding. Place the saucepan over medium heat, ensuring all ingredients are evenly mixed to avoid lumps as you proceed toward the creamy pudding consistency.
Step 2: Create the Pudding Base
Gradually whisk in 4 cups of whole milk to the dry mixture, stirring continuously to combine. Cook over medium heat, bringing the mixture to a gentle boil while stirring constantly. As it heats, watch for bubbling and thickening, which should take about 5-7 minutes. Once thickened, reduce the heat and let it simmer for 2 more minutes, then remove from heat.
Step 3: Temper the Eggs
In a separate bowl, whisk 3 large eggs until smooth. To prevent curdling, slowly mix a small amount of the hot pudding into the eggs, then whisk vigorously. Return this egg mixture back to the saucepan with the pudding base, stirring it together. Bring the mixture back to a gentle boil over medium heat, cooking for an additional 2 minutes until it thickens further.
Step 4: Add Vanilla and Cool
Remove the saucepan from heat and stir in 1 tablespoon of pure vanilla extract, ensuring it’s well incorporated into the pudding. Allow the mixture to cool for about 15 minutes, stirring occasionally to prevent a skin from forming. This cooling step helps enhance the flavors of your Old-Fashioned Homemade Banana Pudding as it sets up wonderfully.
Step 5: Layer the Ingredients
In an ungreased 8x8-inch pan, create a lovely layer by placing roughly 25 vanilla wafers on the bottom. Follow this with half of the sliced bananas (about 2 bananas) to add freshness, then pour half of the creamy pudding mixture over the top, allowing it to seep into the layers.
Step 6: Complete the Layers
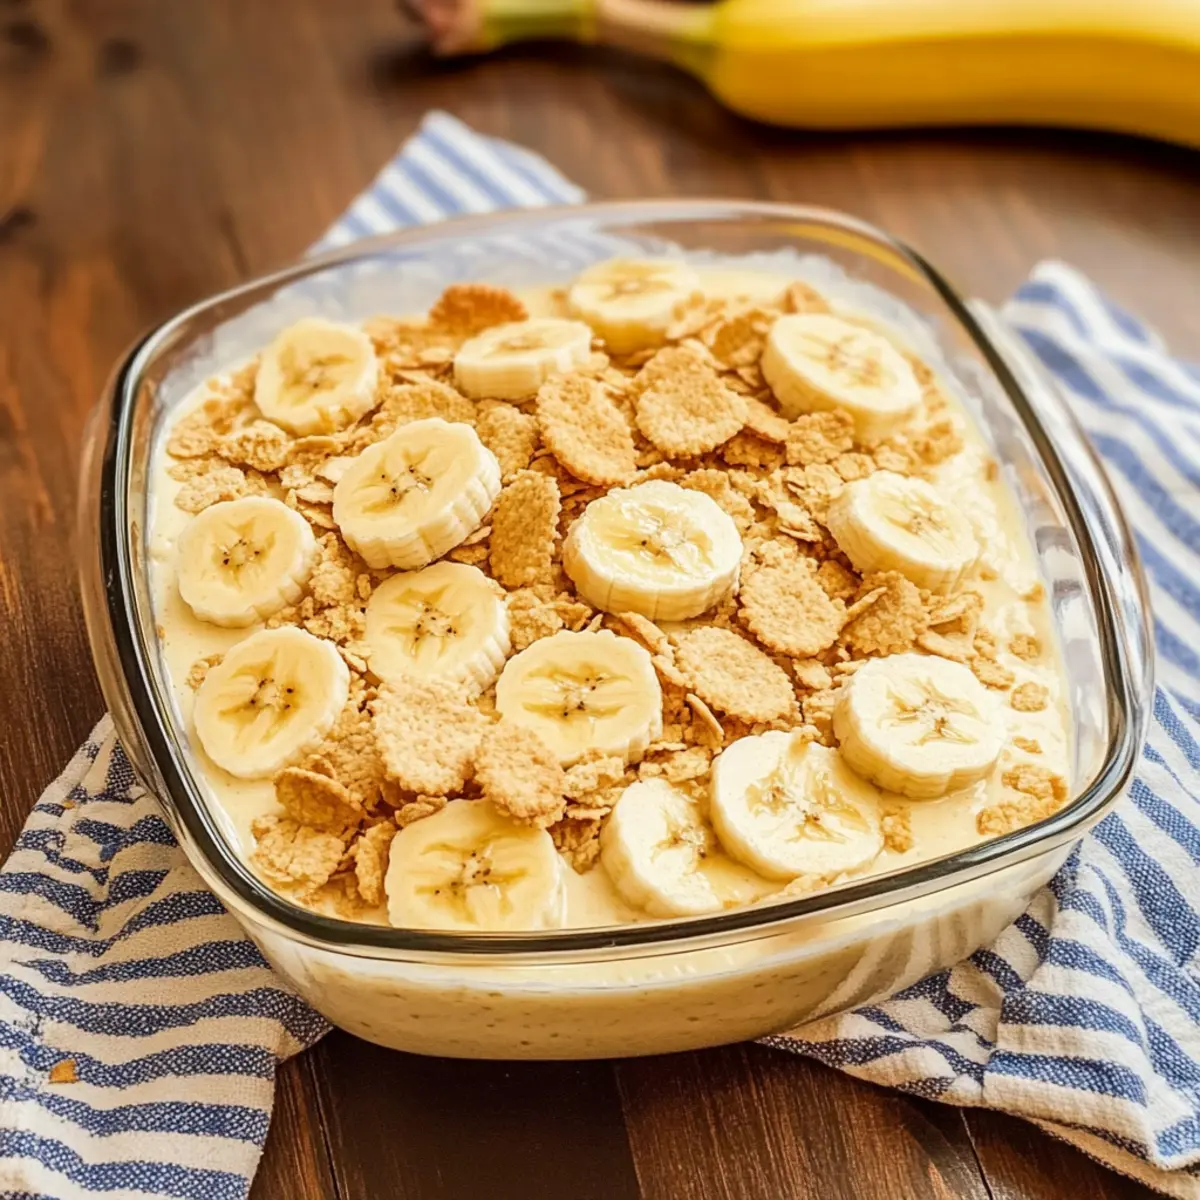
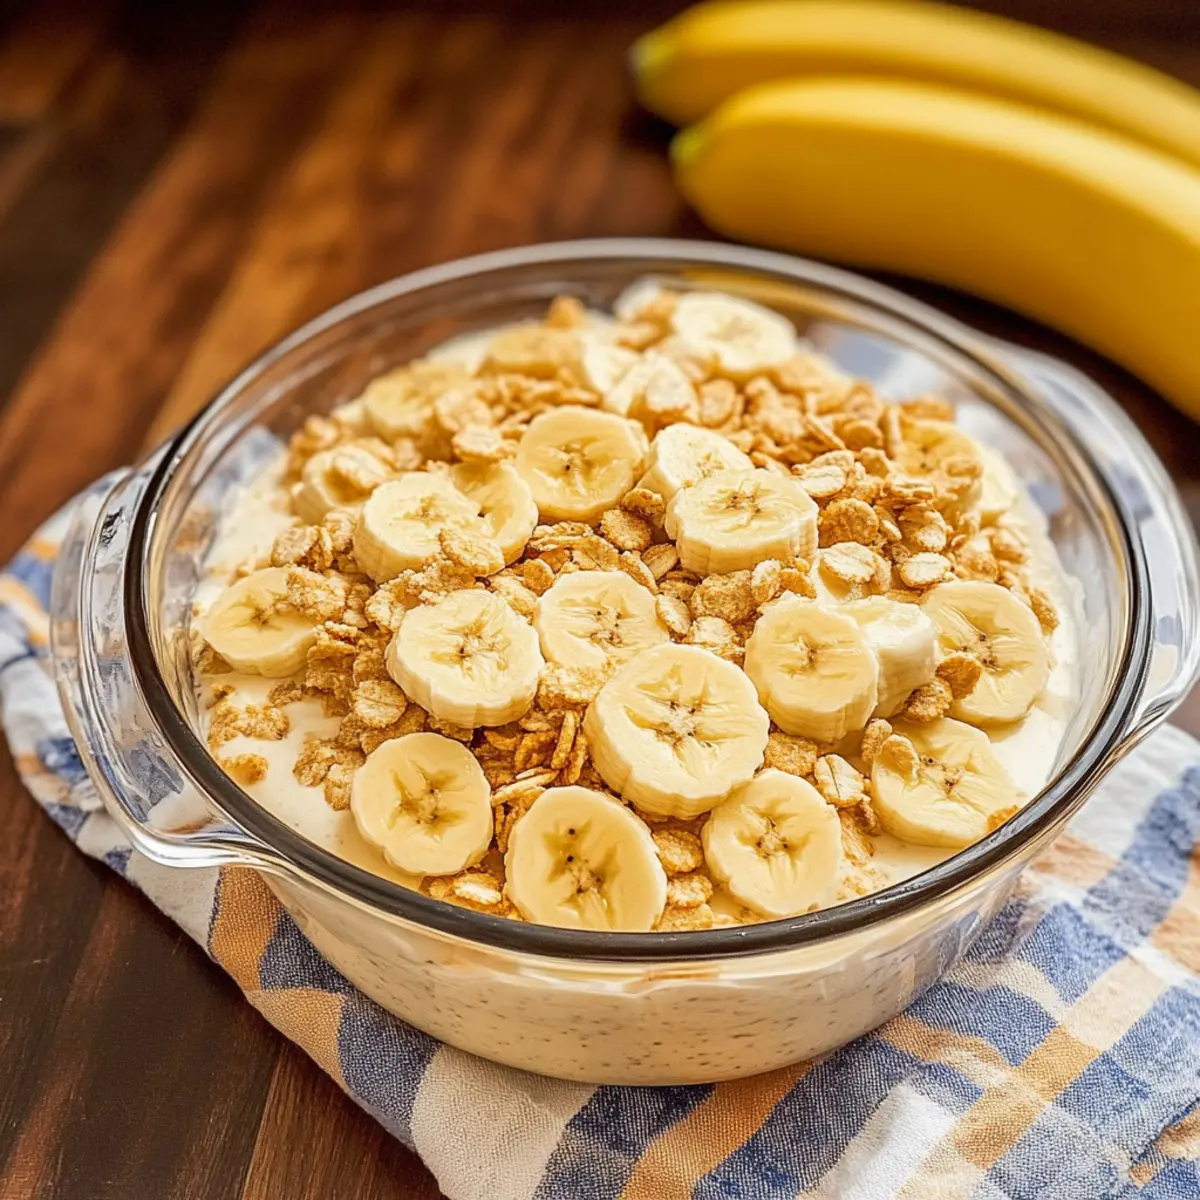
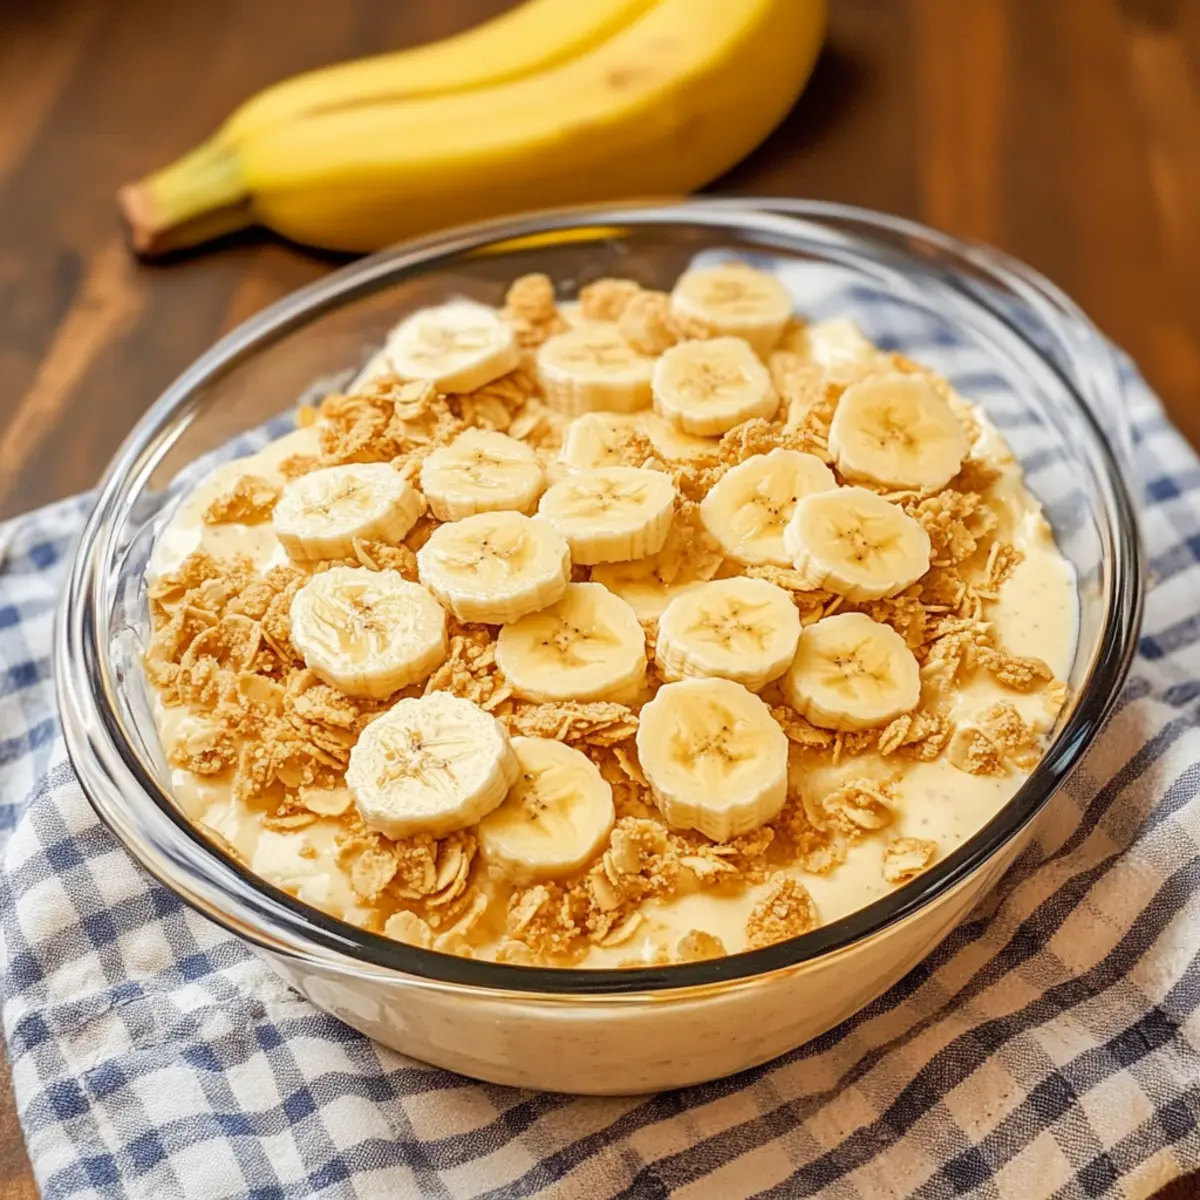
Repeat the layering process by adding the remaining vanilla wafers, followed by the rest of the banana slices. Finish by pouring the last of the pudding mixture over the top to create a luscious finishing layer. This design makes your Old-Fashioned Homemade Banana Pudding visually appealing as well as delicious.
Step 7: Chill and Set
Cover the pan tightly with plastic wrap and refrigerate for at least 4 hours, or ideally overnight. Chilling allows the flavors to meld beautifully while the pudding thickens, giving you that classic texture. This waiting time is key for achieving the perfect Southern-style banana pudding served fresh and cold.
Step 8: Final Touches Before Serving
Before you serve, take a handful of remaining vanilla wafers and crush them into fine crumbs. Sprinkle the crushed wafers on top of the chilled pudding to add a delightful crunch. Serve the Old-Fashioned Homemade Banana Pudding cold, and enjoy the sumptuous blend of creamy pudding, rich bananas, and crispy wafers that will surely please everyone!

How to Store and Freeze Old-Fashioned Homemade Banana Pudding
Refrigerator: Keep your banana pudding in an airtight container in the fridge for up to 4 days. For best results, add bananas just before serving to maintain their freshness.
Freezer: Avoid freezing your Old-Fashioned Homemade Banana Pudding, as it can negatively impact the texture and result in a watery consistency when thawed.
Serving Tips: To enjoy the pudding at its best, serve it chilled directly from the fridge. Sprinkle crushed vanilla wafers on top for added crunch just before serving.
Make-Ahead Option: Preparing the pudding a day in advance can enhance the flavors, allowing them to meld together beautifully. Just remember to keep it covered!
Expert Tips for Old-Fashioned Homemade Banana Pudding
Chill Time Matters: Refrigerate overnight if possible for the best flavor. This allows the layers to set beautifully and flavors to meld.
Perfect Consistency: Make sure your pudding thickens sufficiently before layering. Aim for a custard-like texture to avoid a runny dessert.
Banana Freshness: Always add fresh banana slices just before serving. This preserves their flavor and texture, ensuring they don’t brown.
Avoid Freezing: Do not freeze the pudding. Freezing alters the creamy consistency and can affect the taste.
Layer Creatively: Feel free to experiment with layers by incorporating mashed bananas into the pudding mixture for a stronger banana flavor!
What to Serve with Old-Fashioned Homemade Banana Pudding
Looking to craft the perfect meal around this nostalgic dessert? Let's explore delectable pairings that will elevate your gathering.
- Classic Southern Biscuits: Flaky and buttery, these biscuits provide a comforting contrast to the creamy pudding. Serve them warm for a delightful combo!
- Fresh Fruit Salad: A mix of seasonal fruits brightens the plate, adding a refreshing burst that complements the richness of the pudding.
- Whipped Cream: Fluffy and light, dollops of fresh whipped cream enhance the dessert experience, making each bite feel indulgently special.
- Chocolate Chip Cookies: Soft and chewy, these cookies offer a fun texture that contrasts beautifully with the banana pudding's smooth layers.
- Ice Cream Floats: Creamy vanilla floats with a splash of soda create a playful and nostalgic drink option, harmonizing sweet flavors perfectly.
- Coffee or Sweet Tea: A warm cup of coffee or classic Southern sweet tea serves as a comforting beverage choice that pairs beautifully, enhancing the meal's warmth.
- Mini Cheesecakes: These bite-sized delights introduce a tangy twist, providing a rich contrast and an exciting variety of flavors for your guests.
- Pecan Pie Bars: With their crunchy, nutty layers, these bars add a delightful Southern twist to the dessert table, pleasing every sweet tooth.
Old-Fashioned Homemade Banana Pudding Variations
Feel free to explore these delightful variations to make your Old-Fashioned Homemade Banana Pudding uniquely yours!
-
Mashed Banana Boost: Fold in a cup of mashed bananas into the pudding mix for an intensified banana flavor that will have everyone swooning. Each spoonful will bring that sweet, fruity kick straight to your taste buds.
-
Dairy-Free Delight: Substitute regular milk with almond or coconut milk for a delicious dairy-free version that keeps all the creaminess intact. You'll be pleasantly surprised at how the flavors still shine through!
-
Graham Cracker Switch: Replace vanilla wafers with graham crackers for a subtly different taste and texture. When you sprinkle a bit of cinnamon on top, it adds a warm touch that enhances the sweetness beautifully.
-
Tropical Twist: Incorporate half a cup of crushed pineapple into the layers for a refreshing hint of tropical flavor that complements the bananas perfectly. This will transport you to sunlit beaches with each bite!
-
Caramel Drizzle: Drizzle caramel sauce over the layers before serving for an indulgent sweetness that takes this classic dessert to new heights. The rich caramel pairs perfectly with the creamy pudding and bananas.
-
Chocolate Lover's Dream: Add a layer of chocolate pudding between the traditional layers for a decadent twist that chocolate lovers won't be able to resist. It creates a beautiful marbled effect and a delightful surprise.
-
Berry Fusion: Toss in some fresh berries like strawberries or blueberries along with the bananas for a colorful burst of flavor. Not only does it look stunning, but it enhances the taste experience with a nice tartness.
-
Spicy Pickle Kick: Feeling adventurous? Add a spoonful of Spicy Pickle Brine to the pudding mixture for an unexpected and bold flavor profile that adds complexity to the sweetness.
Now that you have these delightful variations, dive back into the kitchen and let your creativity shine while making this timeless dessert even more special!
Make Ahead Options
These Old-Fashioned Homemade Banana Pudding are perfect for busy cooks looking to save time! You can prepare the pudding base up to 24 hours in advance and keep it refrigerated. To do this, simply follow all the steps until chilling the pudding. However, it's best to layer the bananas and vanilla wafers just before serving to maintain their freshness and texture. The assembled pudding can be stored in the refrigerator for up to 4 days, but remember to cover it tightly with plastic wrap. When you're ready to serve, sprinkle the crushed wafers on top for that delicious crunch and enjoy a delightful treat with minimal effort!
Old-Fashioned Homemade Banana Pudding Recipe FAQs
What type of bananas should I use for the pudding?
Always choose ripe, yellow bananas for your Old-Fashioned Homemade Banana Pudding. They provide the best flavor and sweetness. Avoid bananas with dark spots all over, as they might be overripe and could compromise the dessert's taste.
How long can I store the banana pudding in the fridge?
You can store leftover banana pudding in an airtight container in the refrigerator for up to 4 days. To maintain its freshness and presentation, I recommend not to add fresh banana slices on top until you're ready to serve.
Can I freeze the banana pudding?
It's best to avoid freezing the Old-Fashioned Homemade Banana Pudding, as this can compromise its creamy texture and lead to separation of ingredients once thawed. This dessert is best enjoyed fresh!
What’s the ideal way to prepare the pudding to avoid lumps?
To ensure a smooth pudding, when cooking the pudding base, whisk the sugar, flour, and salt together thoroughly before gradually adding milk. Stir continuously as it heats on medium, and watch for bubbles to form, which usually takes about 10 minutes. This technique helps prevent any lumps from forming in your pudding.
Are there any dietary considerations I should keep in mind?
If you have dietary restrictions, you can make the pudding dairy-free by substituting milk with almond or soy milk. Also, for a gluten-free option, consider using cornstarch (half the amount of flour) as a thickener. However, the use of eggs is critical in achieving the creamy texture, so there's no direct substitute for them unless you opt for a specialized egg replacer.
Creamy Old-Fashioned Homemade Banana Pudding You’ll Love
Ingredients
Equipment
Method
- In a medium saucepan, whisk together sugar, flour, and a pinch of salt until well blended.
- Gradually whisk in the milk, stirring continuously to combine. Cook over medium heat until it thickens.
- Whisk the eggs until smooth, then temper by adding a small amount of the hot pudding into the eggs.
- Return the egg mixture to the saucepan and bring back to a gentle boil, cooking until thickened.
- Stir in the vanilla extract and allow to cool for about 15 minutes.
- In an ungreased pan, layer 25 vanilla wafers, half of the sliced bananas, and half the pudding mixture.
- Repeat the layers with the remaining vanilla wafers, banana slices, and pudding mixture.
- Cover and refrigerate for at least 4 hours or overnight.
- Before serving, crush remaining vanilla wafers and sprinkle on top.


Leave a Reply