
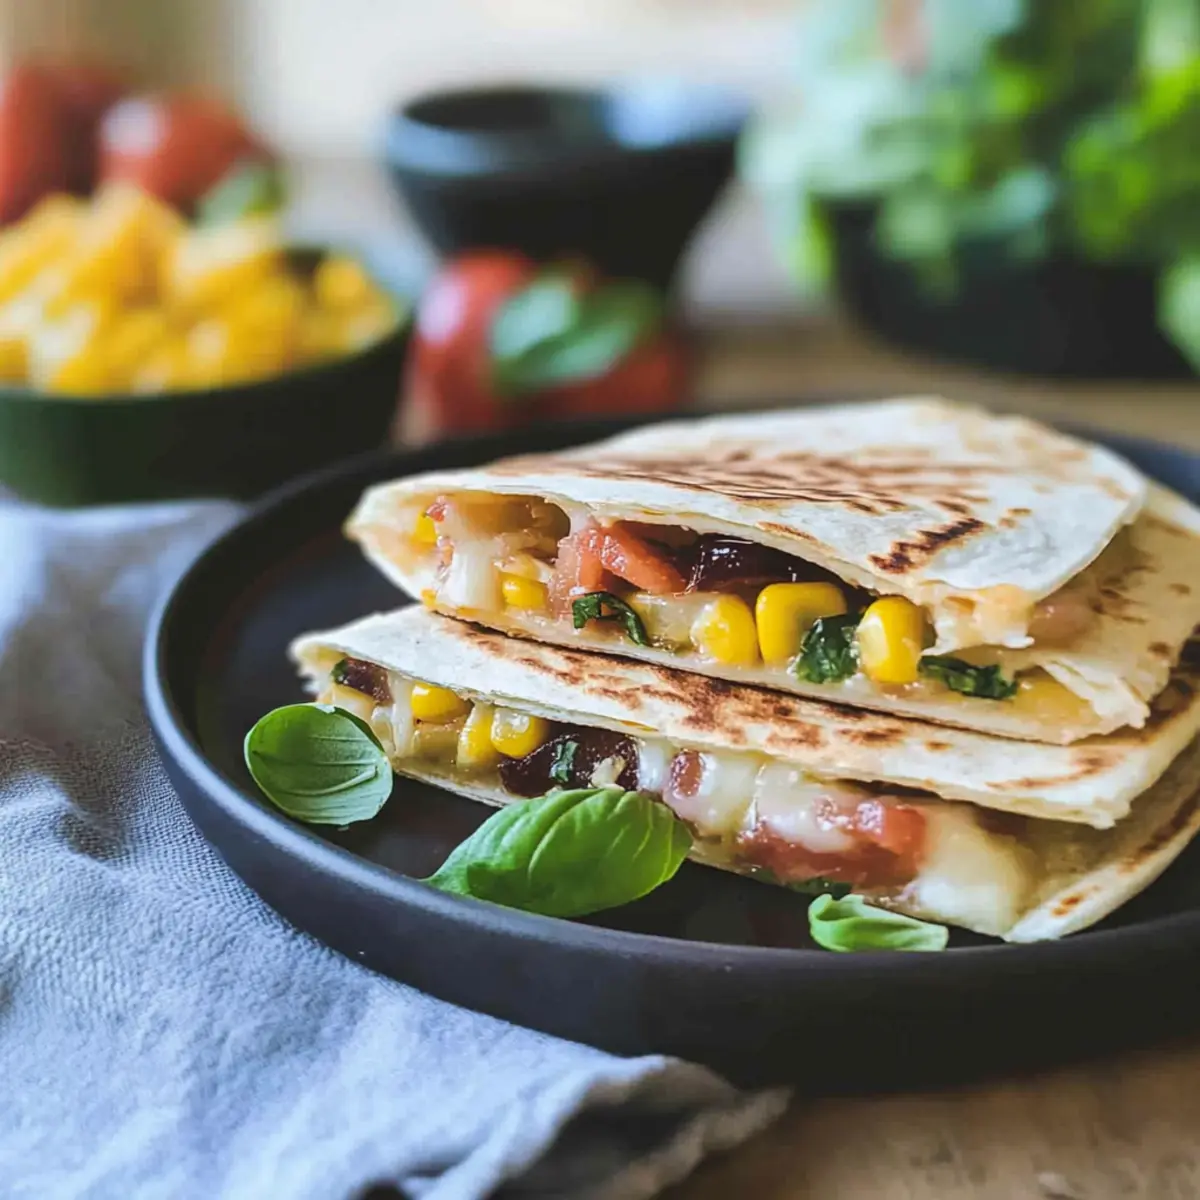
As summer unfolds, each visit to the farmers' market feels like a treasure hunt for vibrant produce that bursts with life. On one of those sunny Saturdays, I stumbled upon an array of glossy heirloom tomatoes and sweet, golden corn, instantly inspiring my latest creation: the Summer Harvest Cheddar Quesadilla. This delightful dish is all about simplicity, allowing you to whip up a mouthwatering meal in just 20 minutes while showcasing the fresh flavors of the season. Not only is it a vegetarian wonder that pleases everyone around the table, but it’s also a quick fix for those busy weeknights when you crave something delicious without the fuss. So, are you ready to bring the taste of summer into your kitchen?
Why is this quesadilla a must-try?
Quick and Easy: This Summer Harvest Cheddar Quesadilla takes just 20 minutes to make, perfect for those busy nights when you want something delicious without the hassle.
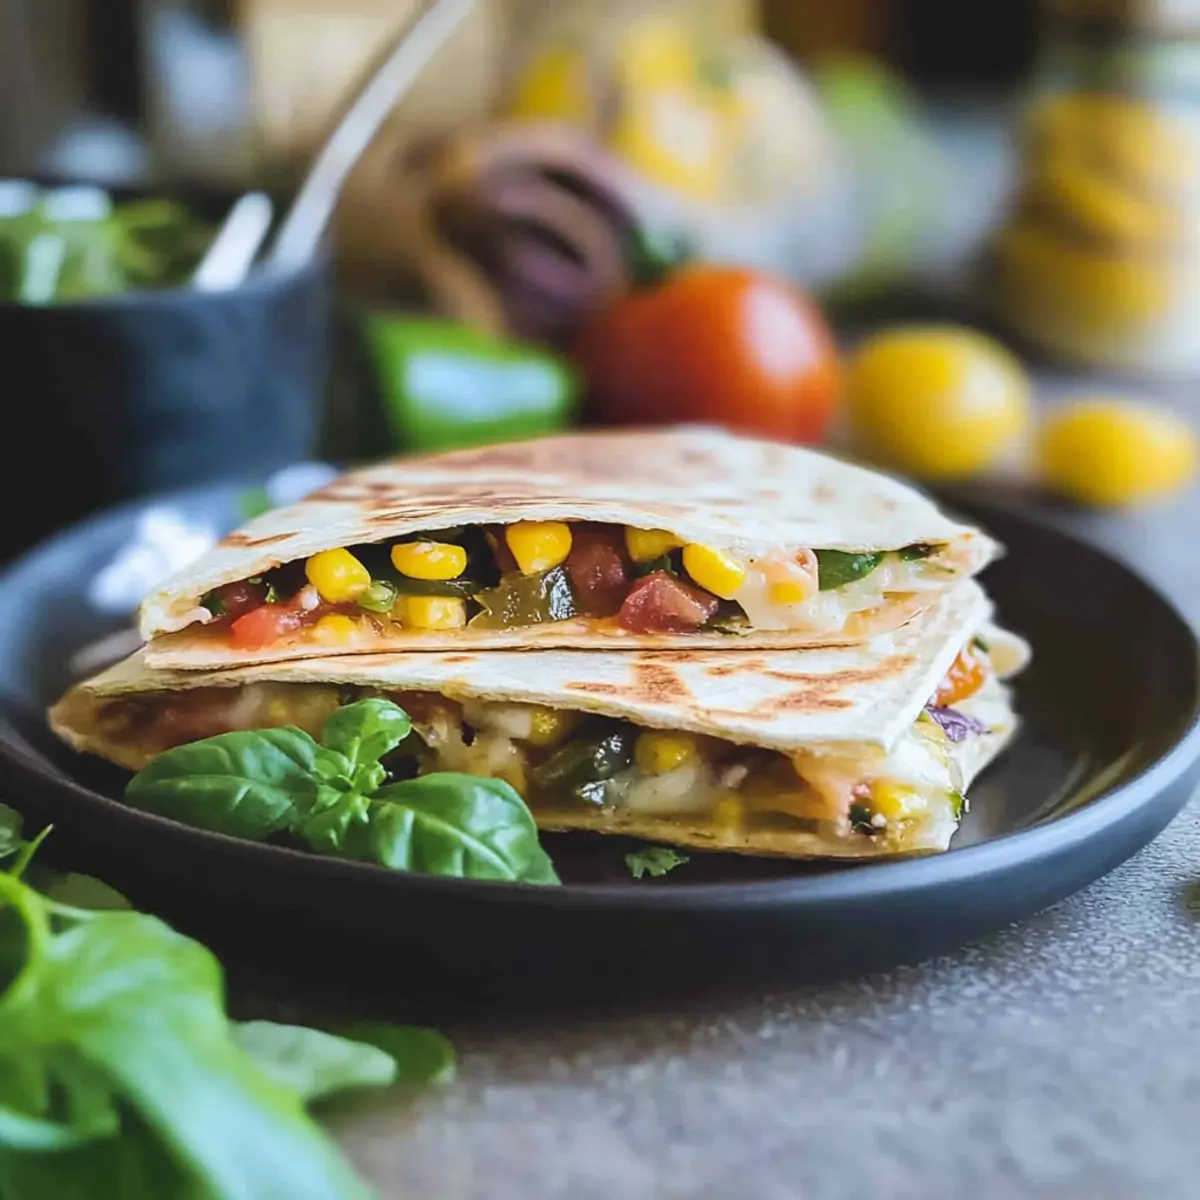
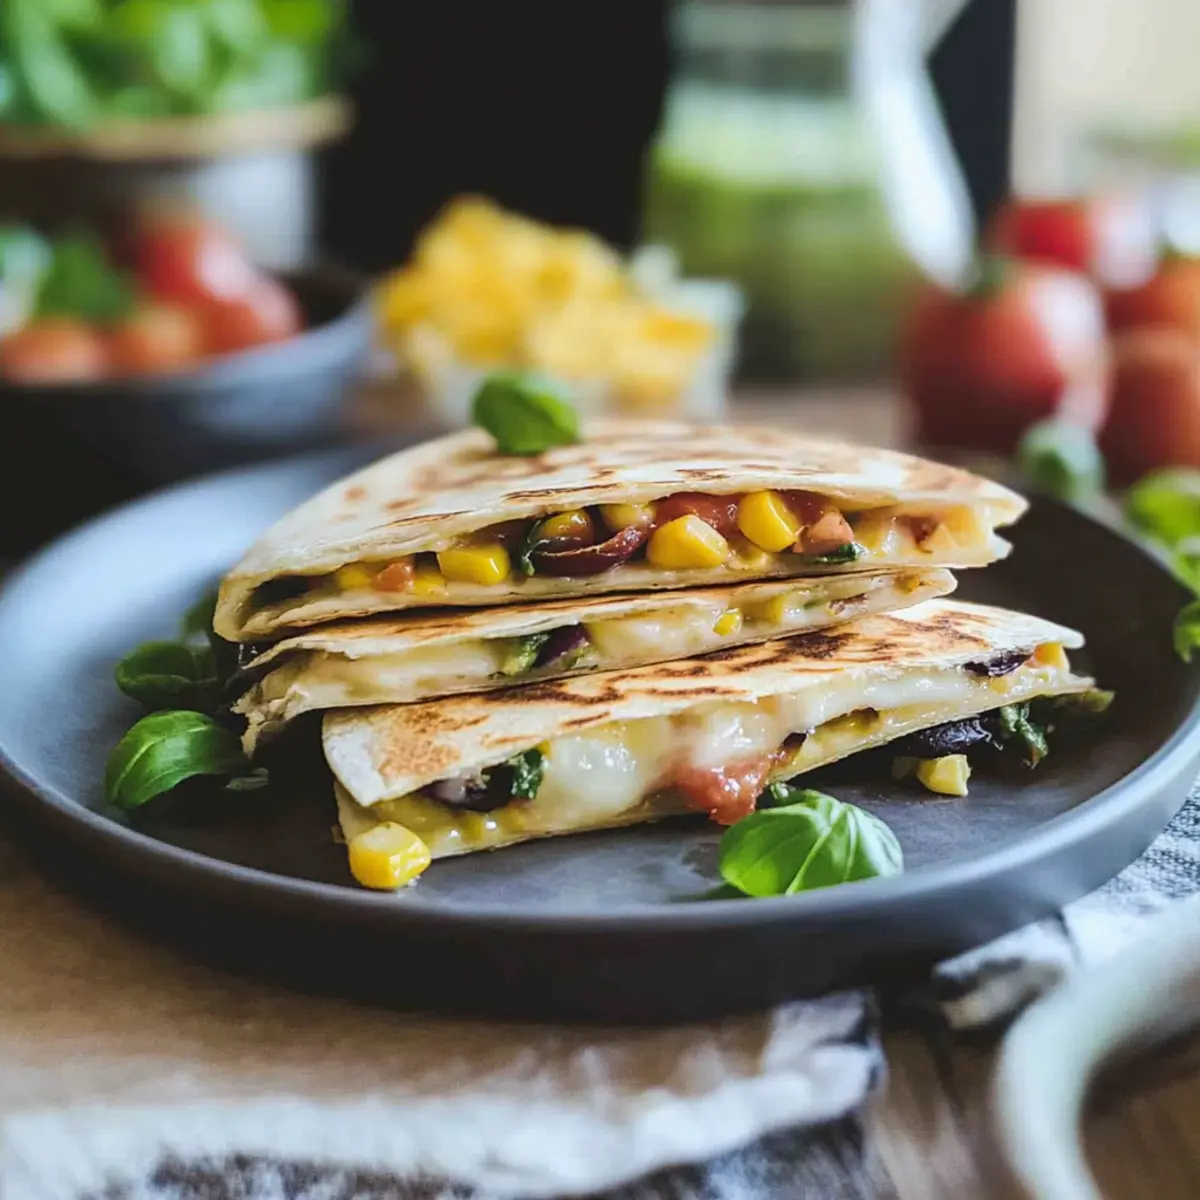
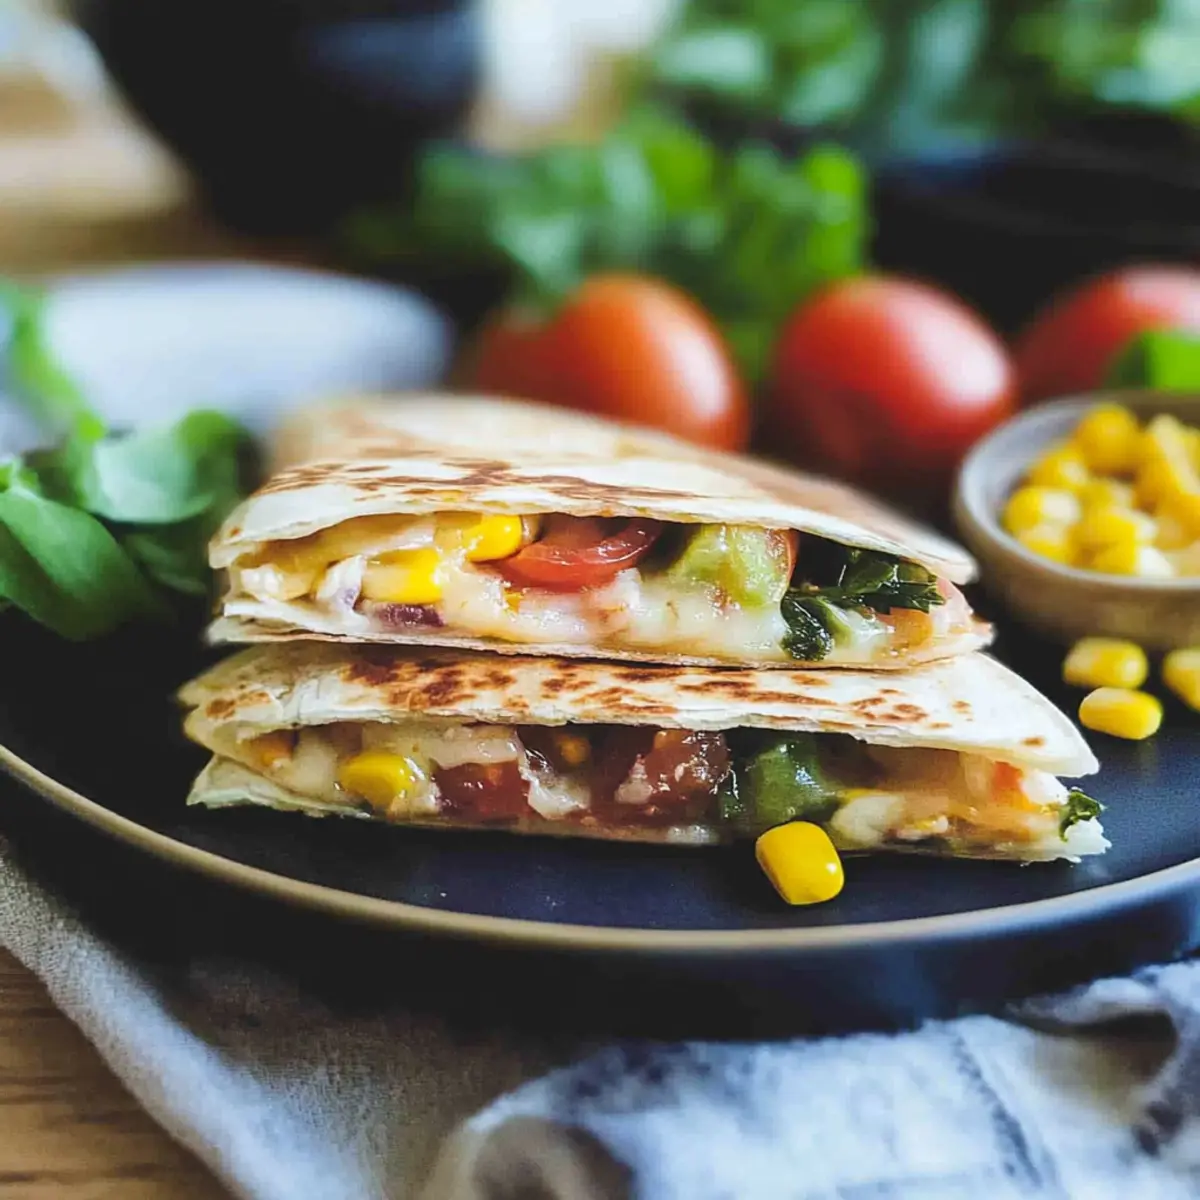
Fresh Ingredients: Bursting with heirloom tomatoes and sweet corn, it’s a celebration of summer’s best produce, delivering vibrant colors and flavors to your plate.
Vegetarian Delight: Great for vegetarians and meat lovers alike, this recipe allows for easy customization—the addition of chicken or beef brisket can elevate it further.
Perfect Pairing: Enjoy it with your favorite salsa or a side of Street Corn Coleslaw to round out the meal!
Versatile Options: Feel free to switch up the cheese or add avocado for an extra creamy twist. This quesadilla is not just a meal; it’s a culinary canvas ready for your unique touch.
-
Ingredients
• • Summer Harvest Cheddar Quesadilla Ingredients -
For the Filling
- Olive oil – Adds richness and helps sauté the vegetables; substitute with avocado oil for a different flavor.
- Fresh corn – Provides sweetness and texture; use canned corn if fresh is unavailable.
- Red onion – Adds a mild sweetness when sautéed; shallots can be used as a milder alternative.
- Heirloom tomatoes – Contribute acidity and sweetness; regular tomatoes can be used if heirloom is not available.
- Fresh basil leaves – Enhance the aromatic quality; dried basil can be substituted in smaller quantities, though fresh is preferred for flavor.
- For the Quesadilla
- Flour tortillas – Acts as the base for the quesadilla; gluten-free tortillas are a suitable substitute.
- Cabot Alpine cheddar cheese (or sharp cheddar) – Offers a robust flavor that complements the fresh ingredients; any sharp cheese can work as an alternative.
Enjoy crafting your Summer Harvest Cheddar Quesadilla with these fresh ingredients!
Step‑by‑Step Instructions for Summer Harvest Cheddar Quesadilla
Step 1: Sauté the Vegetables
In a large skillet, heat 1 tablespoon of olive oil over medium heat until shimmering. Add 1 cup of fresh corn kernels and ½ cup of sliced red onion. Sauté these for about 5 minutes, stirring occasionally, until the onion is translucent and the corn is tender. Remove the mixture from the pan and set aside in a bowl.
Step 2: Prepare the Quesadilla Base
In the same skillet, place one flour tortilla over medium heat. Sprinkle half of the grated Cabot Alpine cheddar cheese (or sharp cheddar) evenly on one half of the tortilla. The cheese should start to melt slightly after about 1–2 minutes, creating a delicious base for your Summer Harvest Cheddar Quesadilla.
Step 3: Add the Filling
Layer half of the sliced heirloom tomatoes, along with the sautéed corn and onion mixture, atop the melted cheese. Finish with half of the fresh basil leaves, which will infuse the dish with a fragrant aroma. Fold the empty half of the tortilla over to cover the filling, creating a lovely half-moon shape.
Step 4: Cook the Quesadilla
Cover the skillet with a lid and let the quesadilla cook for 1–2 minutes, until the cheese is fully melted and the tortilla starts to turn golden brown. Keep an eye on it to avoid burning; the edges should be slightly crispy when it’s ready to flip.
Step 5: Flip and Finish Cooking
Using a spatula, carefully flip the quesadilla in half to cook the other side. Continue cooking for another minute, until both sides are golden brown and crispy. The melted cheese should be oozing out slightly, signaling that your Summer Harvest Cheddar Quesadilla is perfectly cooked.
Step 6: Serve and Repeat
Transfer the cooked quesadilla to a plate and cut it into wedges. Repeat the cooking process with the second tortilla and remaining ingredients, ensuring the pan retains enough heat. Serve your quesadillas warm, perhaps with a side of salsa or guacamole for a delightful summer meal.
Storage Tips for Summer Harvest Cheddar Quesadilla
Fridge: Store leftover quesadillas in an airtight container in the refrigerator for up to 2 days to maintain their delicious flavor and texture.
Freezer: For longer-term storage, wrap each cooled quesadilla in plastic wrap and foil, then place them in a freezer-safe bag. They can be frozen for up to 2 months.
Reheating: Reheat quesadillas in a skillet over medium heat for about 3-4 minutes on each side, until heated through and crispy again. Avoid using a microwave for best results!
Enjoy: Relish the last bites of your Summer Harvest Cheddar Quesadilla, a delightful reminder of summer’s bounty even on the busiest days!
Expert Tips for Summer Harvest Cheddar Quesadilla
-
Preheat the Skillet: Make sure your skillet is hot enough to sauté the vegetables without steaming them, achieving that perfect caramelization.
-
Mind the Filling: Avoid overstuffing your quesadilla; this will make it tricky to flip and can lead to delicious cheese spills.
-
Cheese Melting: Let the cheese properly melt before folding; a well-melted cheese is key to the glorious texture of your Summer Harvest Cheddar Quesadilla.
-
Use Fresh Ingredients: Whenever possible, opt for fresh heirloom tomatoes and corn—they bring superior flavor to your dish compared to their canned counterparts.
-
Vary Your Cheese: Experiment with different sharp cheeses or even add a spicy twist with pepper jack for exciting flavor combinations.
Make Ahead Options
These Summer Harvest Cheddar Quesadillas are perfect for meal prep enthusiasts looking to save time during busy weeknights! You can sauté the corn and red onion mixture up to 24 hours in advance and store it in an airtight container in the refrigerator. Additionally, slice the heirloom tomatoes and chop the basil ahead of time; they’ll stay fresh for about 3 days when refrigerated properly. When you’re ready to enjoy the quesadillas, simply heat a skillet, add the prepped ingredients onto a tortilla, sprinkle with cheese, and follow the cooking instructions. This way, you'll have a delicious, fresh meal with minimal effort, just as delightful as if you made it from scratch!
What to Serve with Summer Harvest Cheddar Quesadilla
Nothing elevates a delightful summer dish quite like a few perfectly chosen sides to complement its vibrant flavors.
-
Fresh Garden Salad: A light and crisp salad filled with mixed greens, cucumbers, and a zesty vinaigrette balances the richness of the quesadilla beautifully.
-
Guacamole and Salsa: Creamy guacamole paired with tangy salsa provides a refreshing dip, enhancing every cheesy bite. The contrast of flavors and textures is irresistible.
-
Mexican Street Corn: Sweet and slightly smoky, this dish adds a delightful crunch with its buttery finish. Perfect for channeling those summer cookout vibes.
-
Cilantro Lime Rice: Fluffy rice tossed with fresh cilantro and a squeeze of lime not only adds a brightness to your plate but also soaks up any leftover quesadilla goo!
-
Chilled Cucumber Soup: A refreshing counterpart to the warm quesadilla, this chilled soup is light and packed with flavor. It brings a cooling effect, making it delightful in the summer.
-
Craft Beer or Sangria: Toast to the season with a light craft beer or a pitcher of sangria filled with fresh fruits. Both drinks complement the quesadilla’s flavors, adding to the festive dining experience.
Indulge in these pairings to create a memorable meal bursting with the essence of summer!
Summer Harvest Cheddar Quesadilla Variations
Feel free to let your creativity shine by customizing this delightful quesadilla with these exciting variations!
-
Meat Lovers: Add shredded chicken or beef brisket for a hearty protein boost. This twist transforms the dish into a savory delight!
-
Spicy Kick: Swap sharp cheddar for pepper jack cheese to spice things up. It adds a delightful heat that elevates every bite.
-
Creamy Avocado: Include sliced avocado inside the quesadilla or as a topping. Its rich creaminess adds a beautiful contrast to the crispy tortilla.
-
Herb Infusion: Try mixing in cilantro or lime zest instead of basil. These herbs will bring a refreshing burst of flavor to each quesadilla.
-
Sweet Twist: Add sliced peaches or grilled zucchini to the filling for a hint of sweetness. It’s an unexpected but delicious addition that highlights summer flavors.
-
Veggie Extra: For additional veggies, toss in bell peppers or spinach. These colorful ingredients not only add nutrition but also make the dish visually appealing.
-
Cheese Variations: Experiment with goat cheese or fontina for a new flavor profile. Each cheese imparts its own unique taste, making it a fun culinary adventure.
-
Zesty Salsa: Serve with a homemade mango salsa or the perfect Street Corn Coleslaw to complement the quesadilla’s flavors beautifully. It’s a vibrant way to enhance your meal!
Whichever variation you choose, your Summer Harvest Cheddar Quesadilla will be bursting with personality—enjoy every bite!
Summer Harvest Cheddar Quesadilla Recipe FAQs
What is the best way to choose ripe heirloom tomatoes?
Absolutely! When selecting heirloom tomatoes, look for ones that are vibrant in color, firm to the touch, and without dark spots all over. They should yield slightly to gentle pressure, indicating ripeness, but not be overripe or mushy.
How should I store leftover quesadillas?
To keep your leftover Summer Harvest Cheddar Quesadilla fresh, store them in an airtight container in the refrigerator for up to 2 days. Just make sure they cool down before sealing to prevent condensation.
Can I freeze my quesadillas?
Very much! To freeze your quesadillas, first, allow them to cool completely. Then, wrap each quesadilla securely in plastic wrap and aluminum foil to prevent freezer burn, and place them in a freezer-safe bag. They can be stored in the freezer for up to 2 months. When ready to enjoy, reheat in a skillet for the best texture!
What can I do if my quesadilla isn't crispy?
If your quesadilla turns out less crispy than you hoped, ensure your skillet is hot enough before you start cooking, and avoid overstuffing it. If it's cooked but still soft, sauté it a little longer on each side while adjusting the heat to medium-high for that perfect golden-brown crispiness.
Are these quesadillas suitable for those with dairy allergies?
While the Summer Harvest Cheddar Quesadilla features cheese as a main ingredient, you can easily adapt it for dairy allergies. Substitute with a dairy-free cheese alternative or simply increase the veggies for a delightful filling. Always check labels to ensure the substitutes meet dietary restrictions.
What’s the best way to reheat leftover quesadillas?
For the best results, reheat your quesadillas in a skillet over medium heat. Cook for about 3-4 minutes per side until heated through and crispy again. This method helps retain that delightful crunch and melty interior that makes the Summer Harvest Cheddar Quesadilla a favorite!
Delicious Summer Harvest Cheddar Quesadilla in 20 Minutes
Ingredients
Equipment
Method
- In a large skillet, heat 1 tablespoon of olive oil over medium heat until shimmering. Add 1 cup of fresh corn kernels and ½ cup of sliced red onion. Sauté for about 5 minutes until the onion is translucent and the corn is tender. Remove from the pan and set aside.
- In the same skillet, place one flour tortilla over medium heat. Sprinkle half of the grated cheddar cheese evenly on one half of the tortilla. The cheese should start to melt slightly after about 1–2 minutes.
- Layer half of the sliced heirloom tomatoes, along with the sautéed corn and onion mixture, atop the melted cheese. Finish with half of the fresh basil leaves. Fold the empty half of the tortilla over to cover the filling.
- Cover the skillet with a lid and let the quesadilla cook for 1–2 minutes until the cheese is fully melted and the tortilla turns golden brown. Keep an eye on it to avoid burning.
- Using a spatula, carefully flip the quesadilla to cook the other side for another minute until both sides are golden brown and crispy.
- Transfer the cooked quesadilla to a plate and cut it into wedges. Repeat the cooking process with the second tortilla and remaining ingredients.

Leave a Reply